


Home Studio for Birds
Ok, I get it. This photography thing is getting a bit weird with me. I am no longer happy with nature, I have to make it better. Nature provides inconsistent lighting, variable backgrounds, cold ambient temps, irritating pollen in my sinuses, and distant locations far from my refrigerator where my Pilsner Urquell would sit, cold, alone, calling for me.
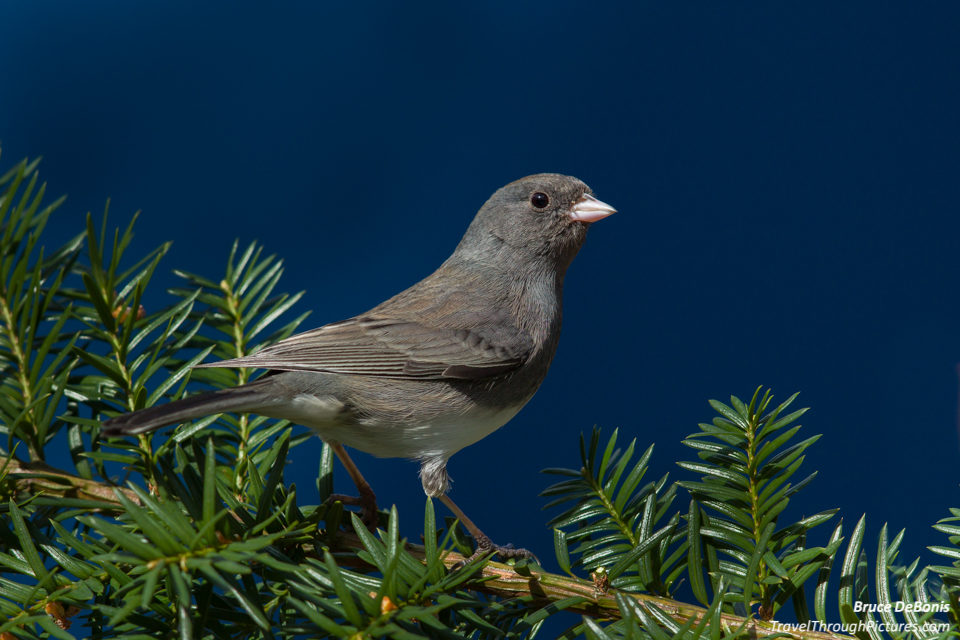
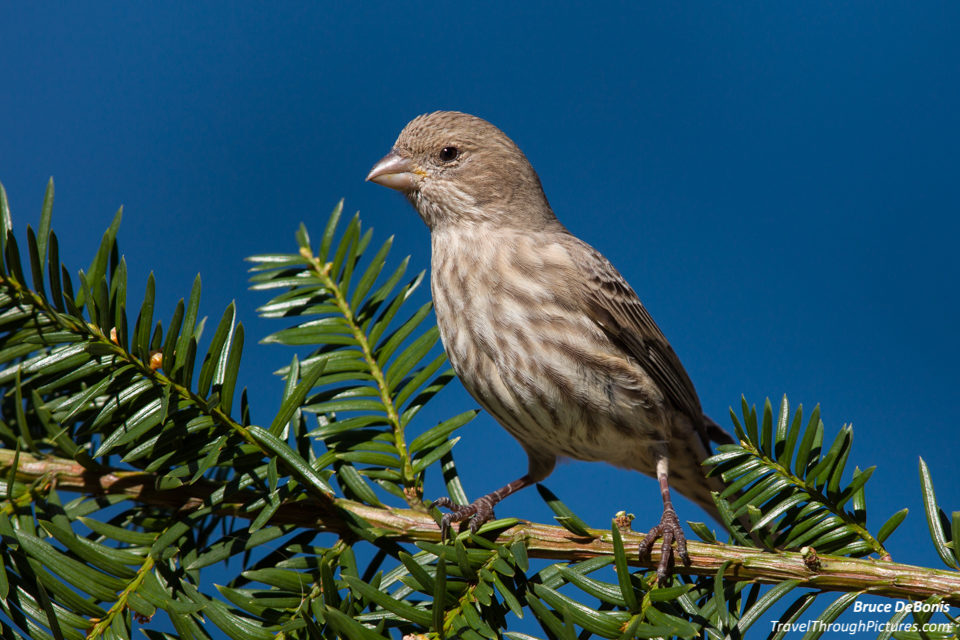
Your Feeder… It’s Where the Action Is!
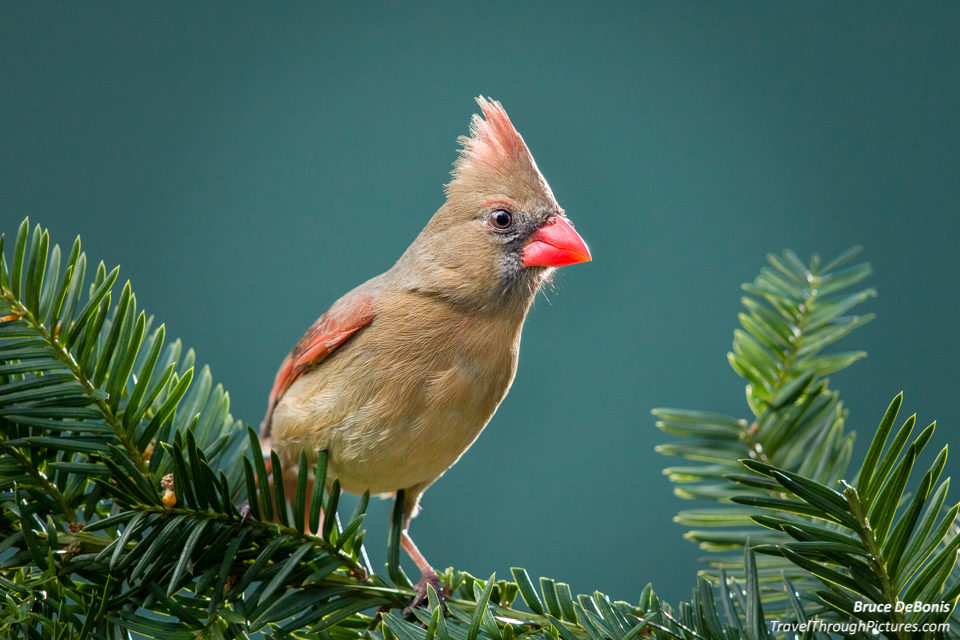
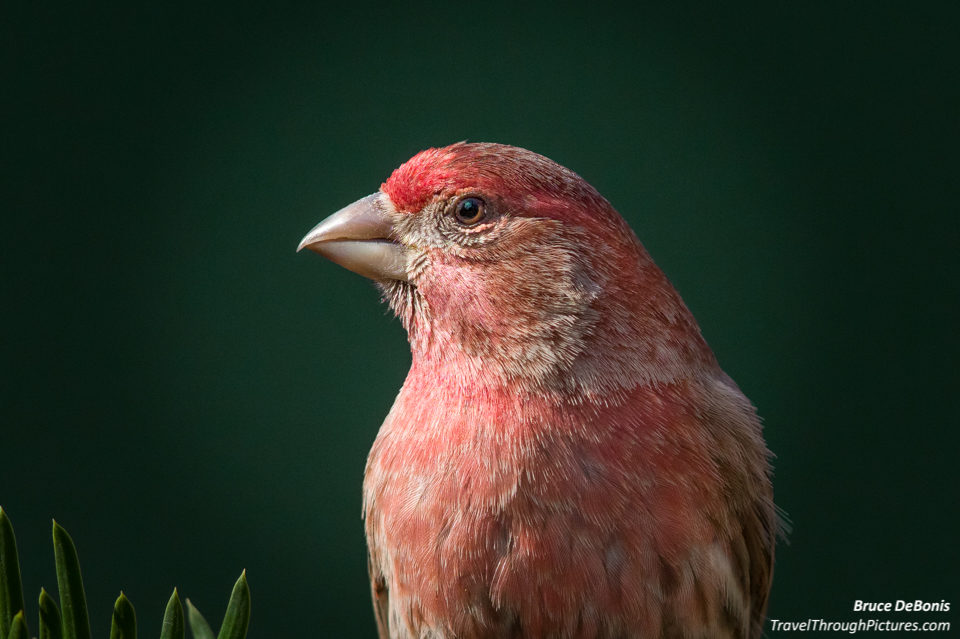
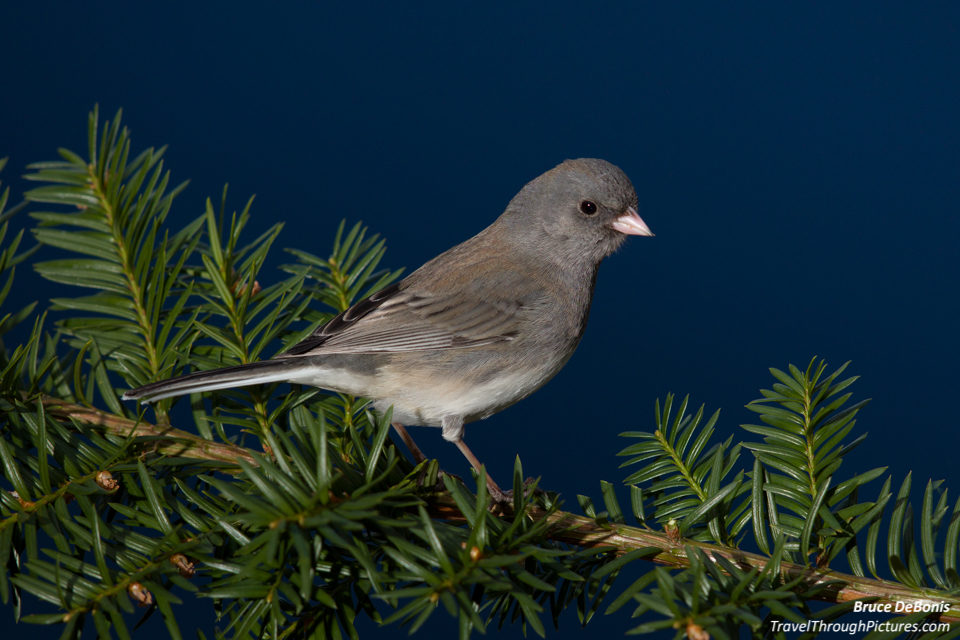
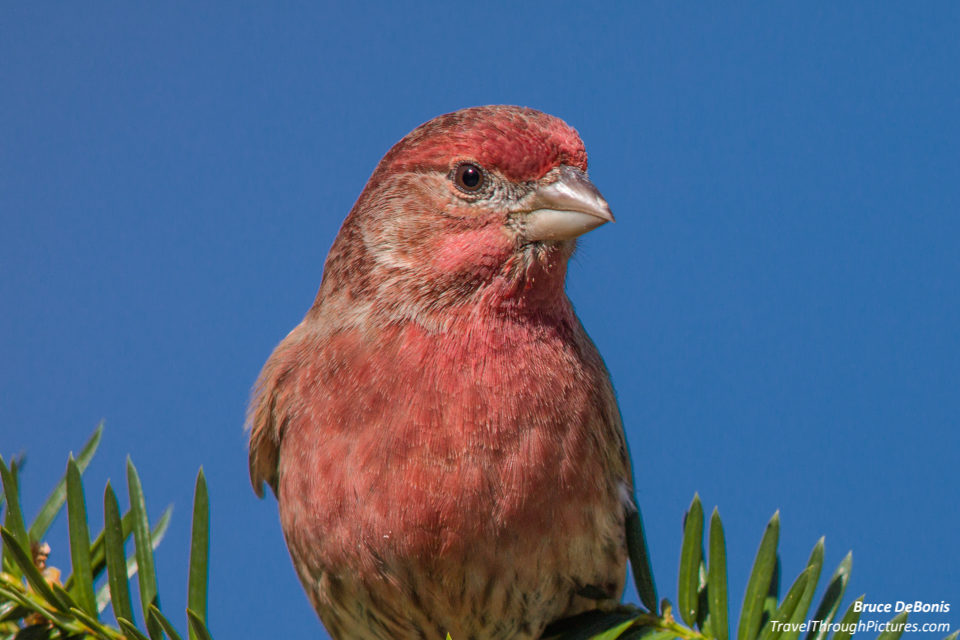
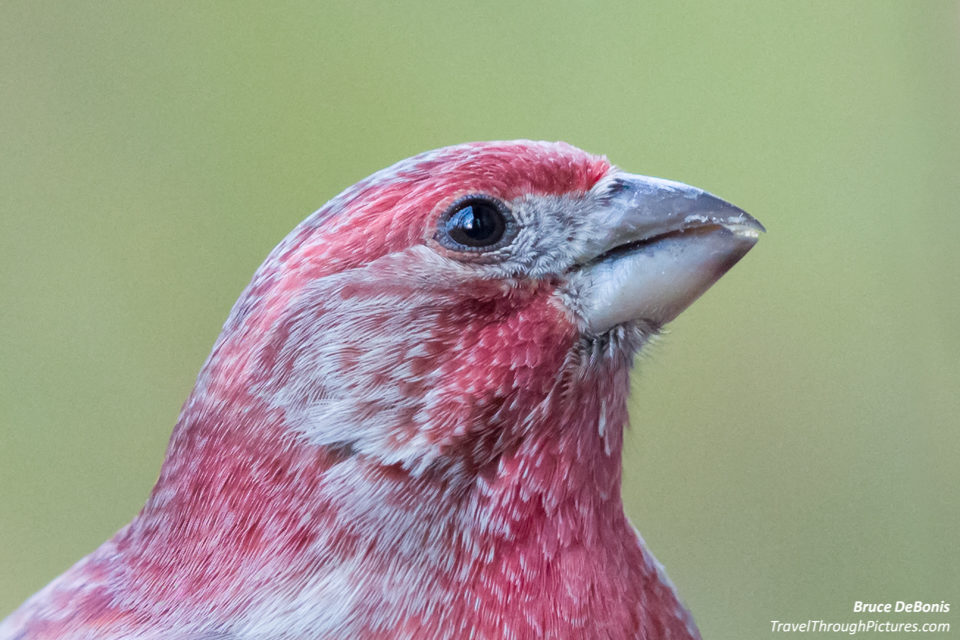
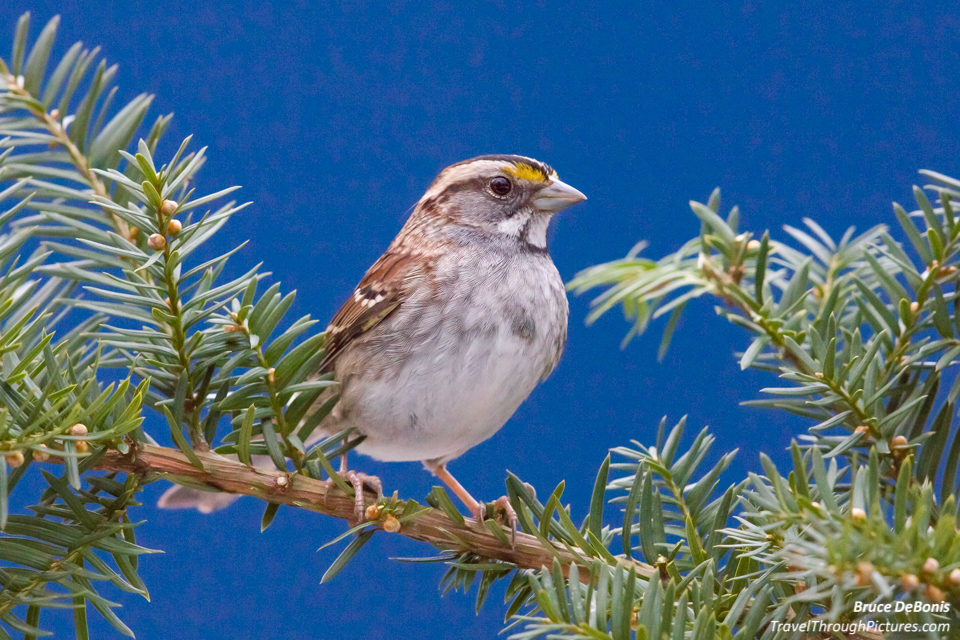
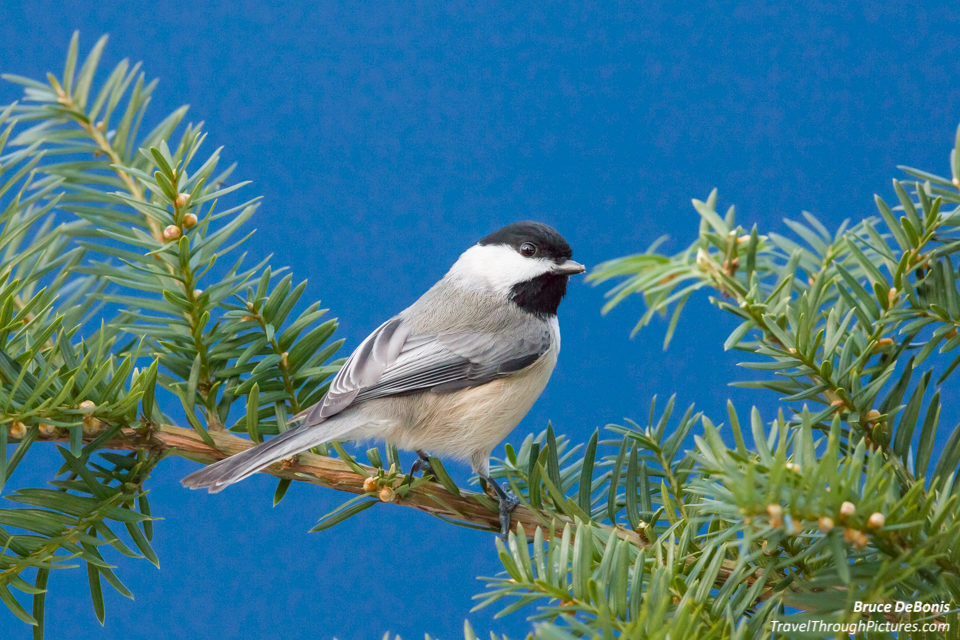
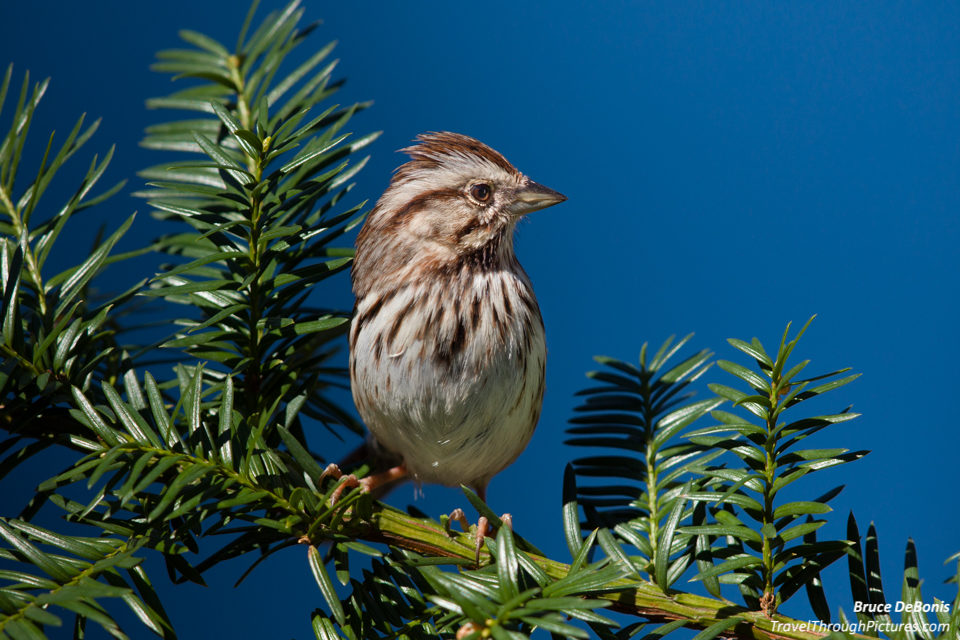
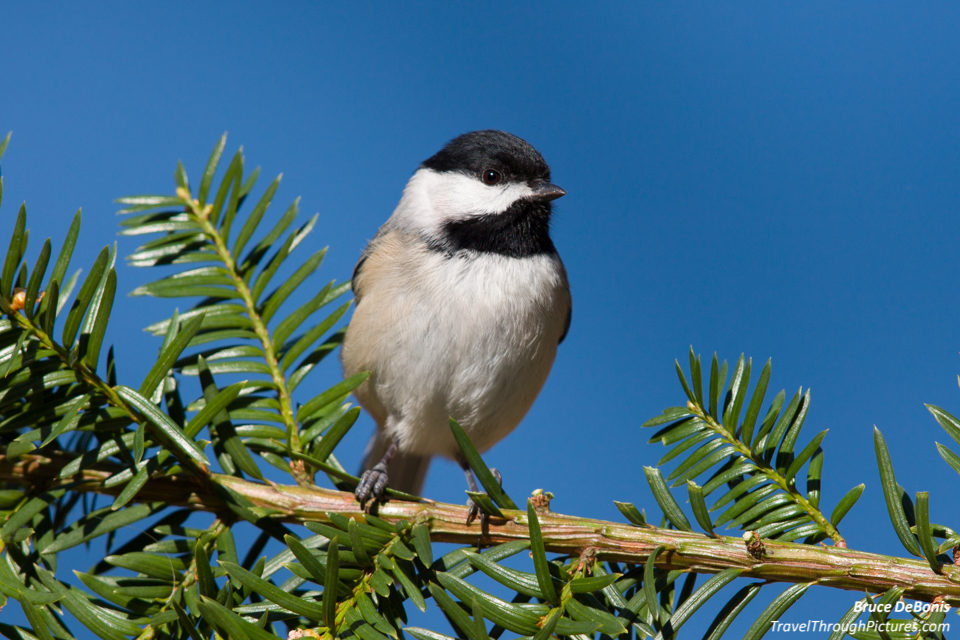
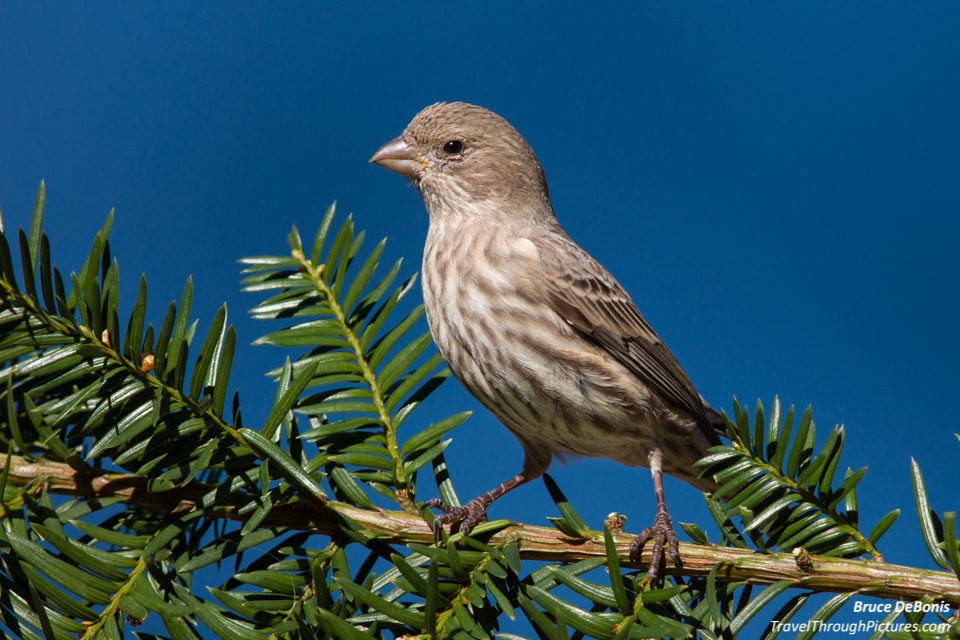
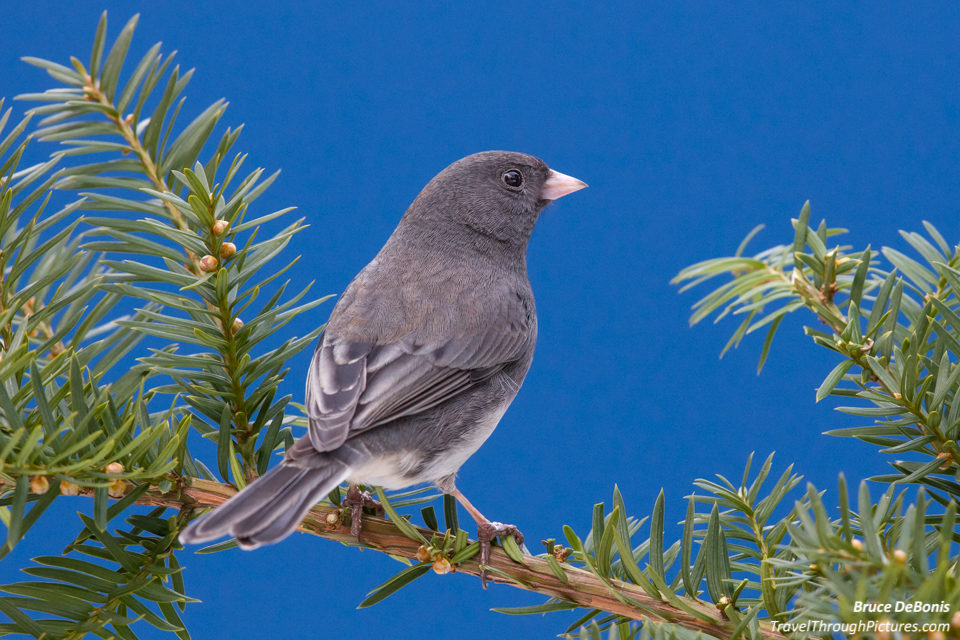
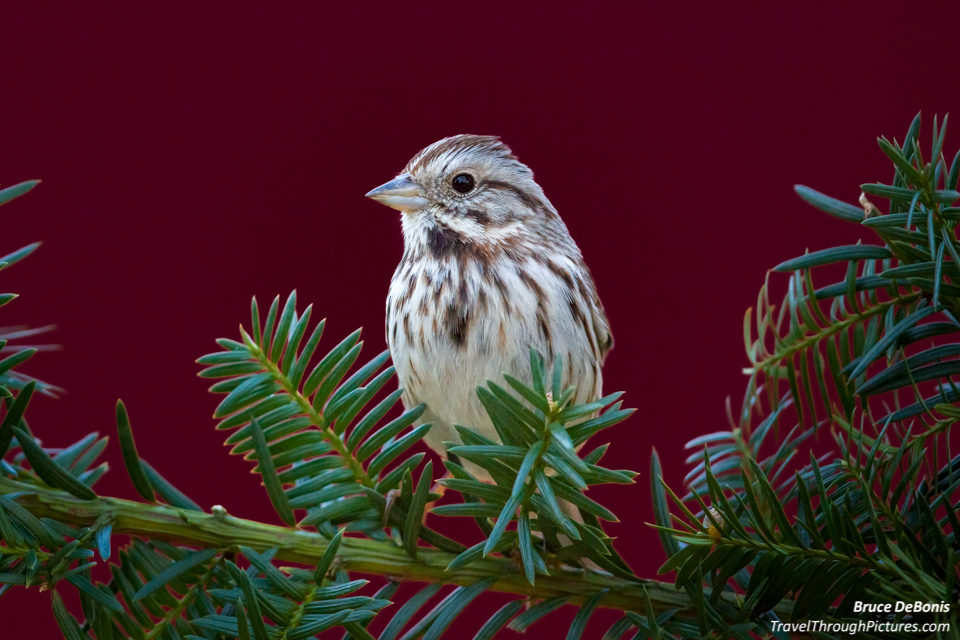
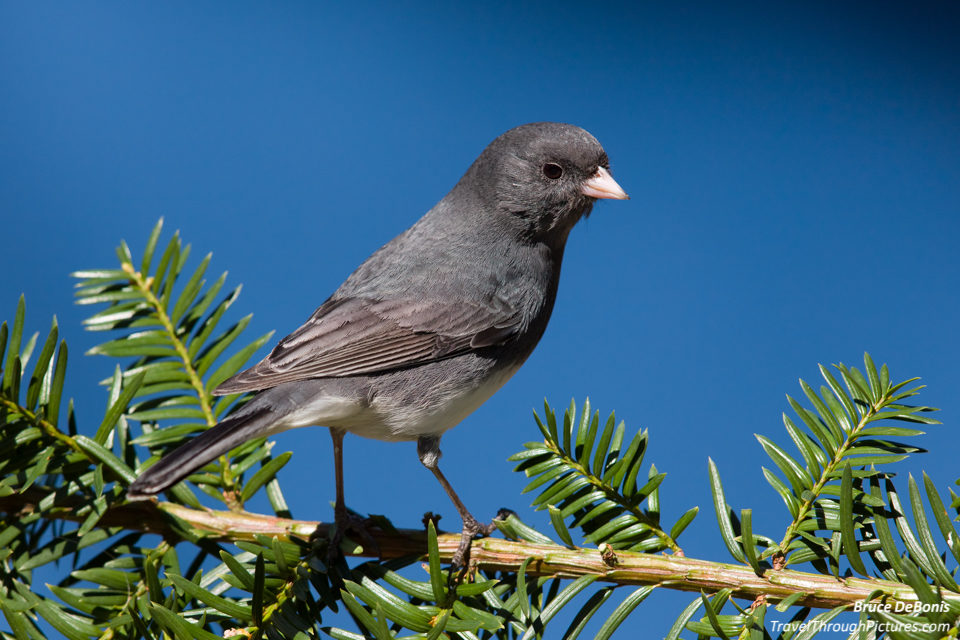
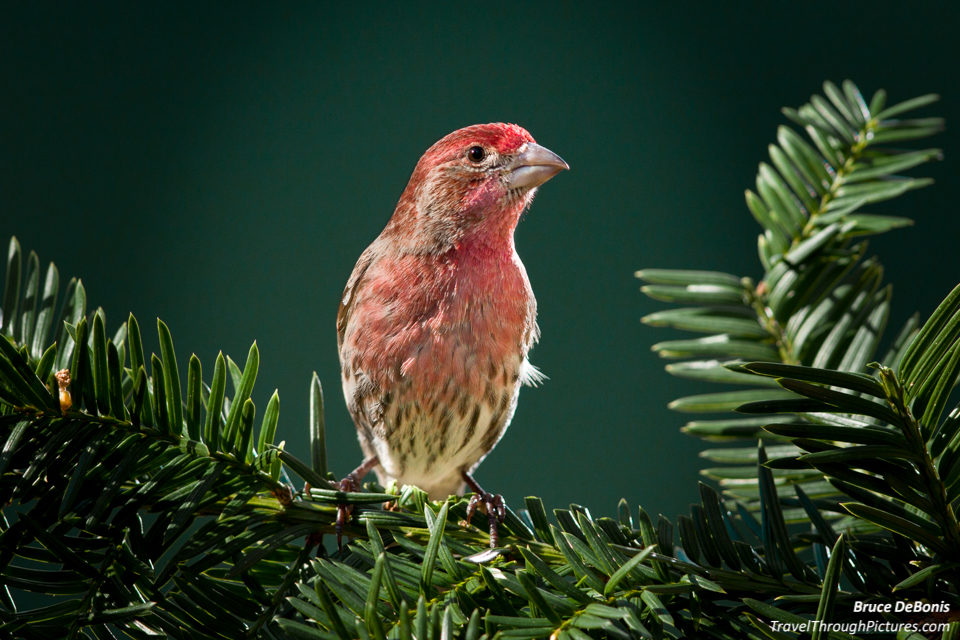
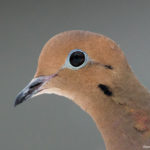
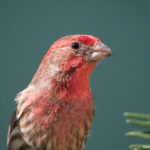
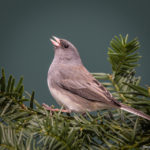
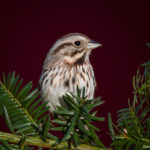
Your feeder gets some cool birds. Why not shoot some photos of these frequent visitors? Now be honest, when you see pictures of birds pecking away at some plastic feed trough, you are not impressed. So, let’s jazz it up a bit. Let’s build a photo studio for birds.
The Ingredients: A branch
Now where are you going to find a branch? B&H photo store in New York doesn’t even carry them for goodness sake. What to do? Try this: Go out in your yard and yank one off of a bush. Then attach it to your feeder. Wow, this is getting technical.
Actually there are a few things to consider when attaching a branch to your feeder. Consider these:
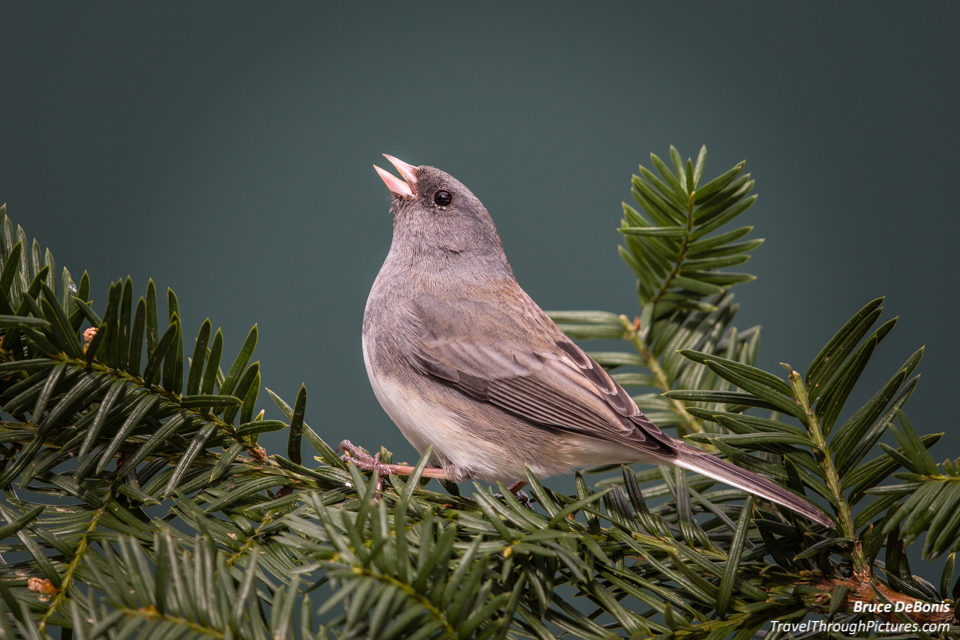
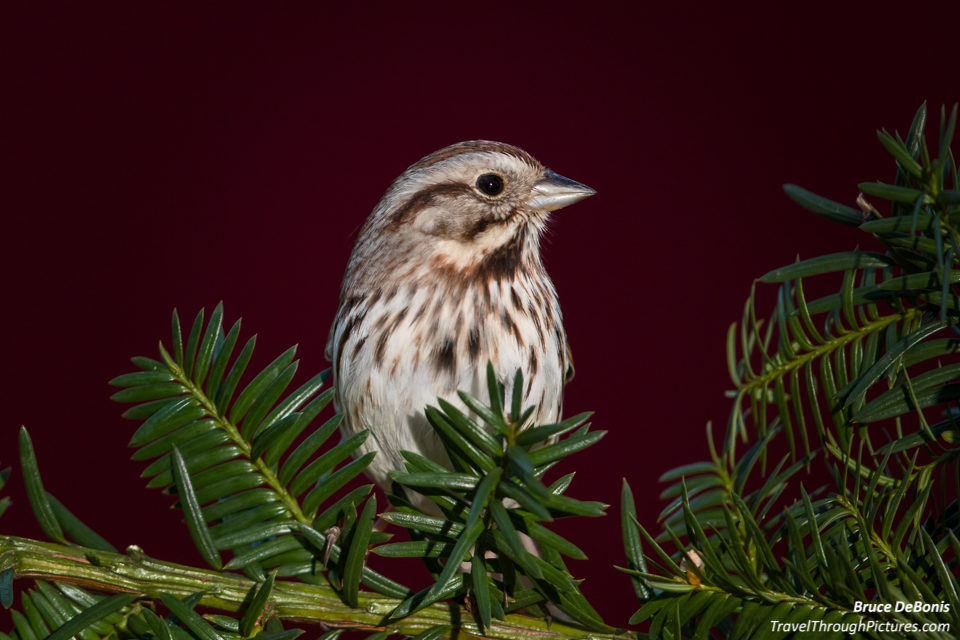
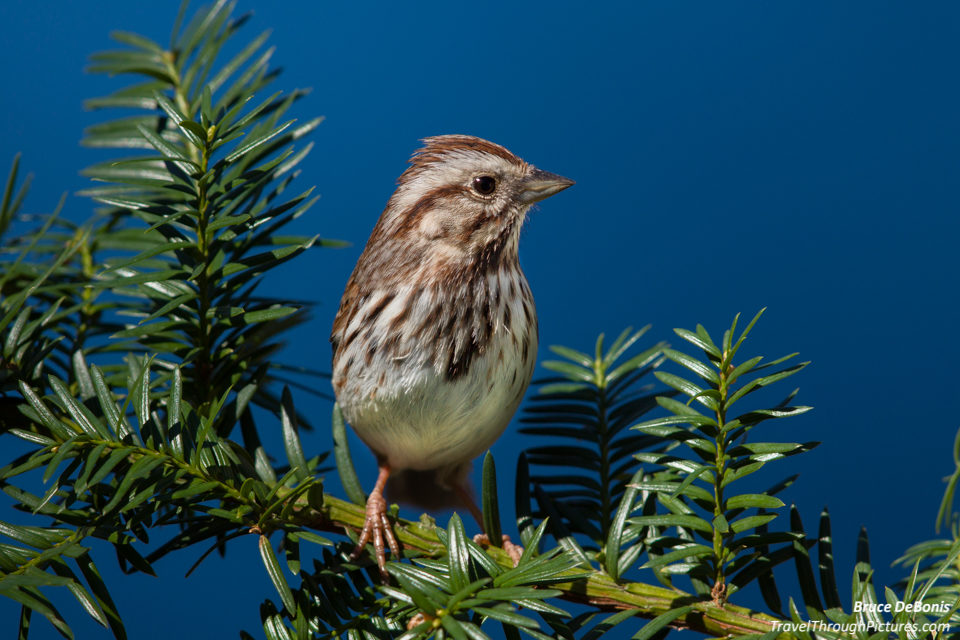
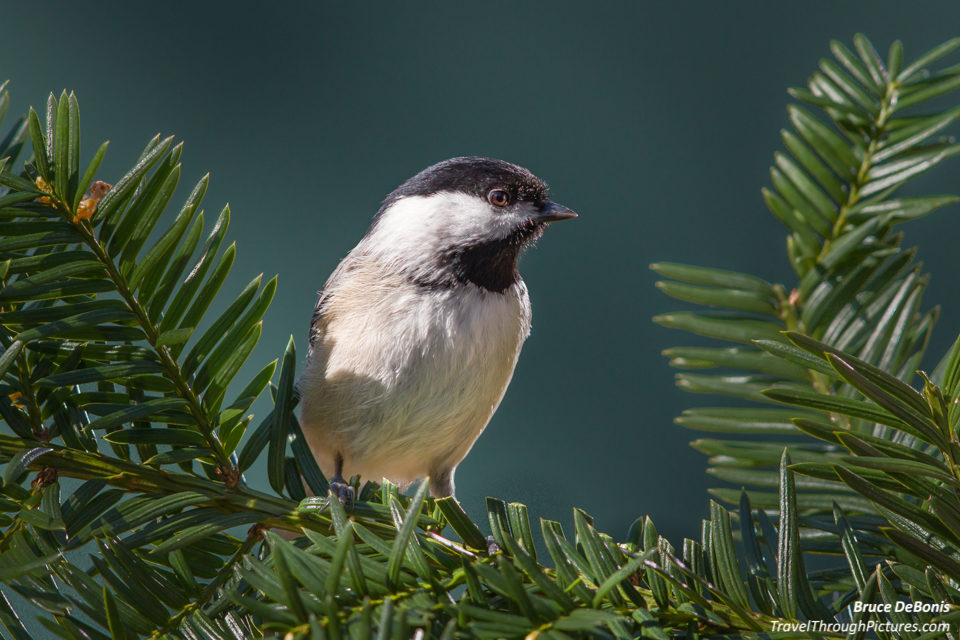
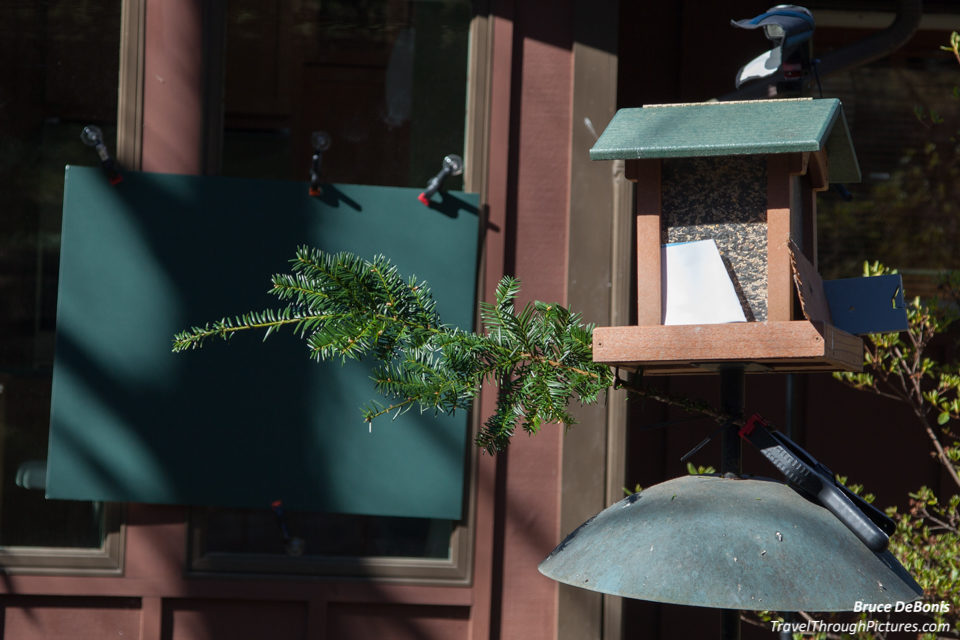
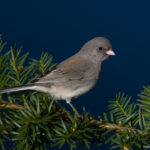
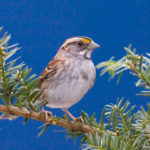
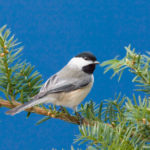
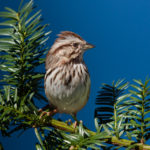
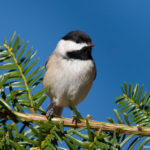
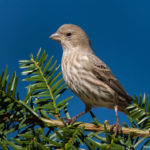
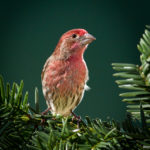
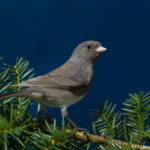
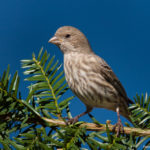
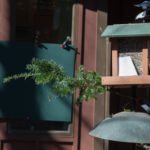
- Block birds from feeding on all sides but the branch side. I place objects in the feeder troughs to block the birds from using them. This forces the birds to the side of the feeder where your branch is. The increased bird traffic here will then require the birds to stop off on your new branch.
- Snip a few leaves or branches to provide an empty spot where the birds will perch. Birds like a comfortable place to stand…. Would you want to stand in a place where you may get a stick up your … um… whatever.
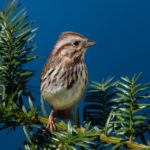
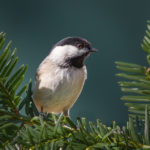
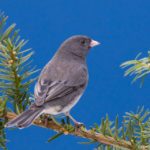
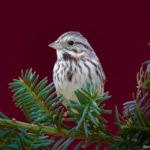
- Position your branch to be perpendicular to your camera and parallel to your background. This helps focusing as the bird will always be in the focus plane regardless of where your camera grabs focus… it may grab a leaf and not the bird.
- Position the branch so that the leaves look natural. True story: My mother saw one of my feeder shots and immediately said the leaves were upside down. “Crappy shot son.” Thanx mom.
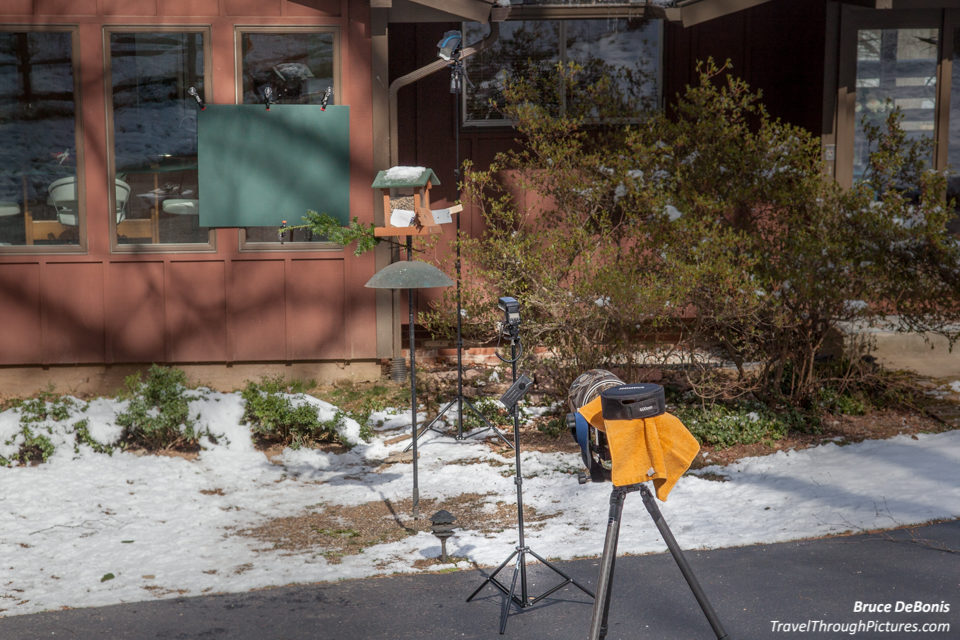
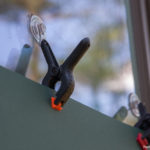
Background: A piece of paper
Go to Michael’s Crafts and get a colored piece of card. They have them in a few places in the store such as foam board and construction paper. The most expensive but best colors are stock they use in the picture framing department. A simple dark green or medium blue are the best. By the way, while you are there, get a sheet of white foam board…. I use this white foam board quite a bit to reflect sun or flash and is probably the most used piece of kit I use other than a lens and camera body.
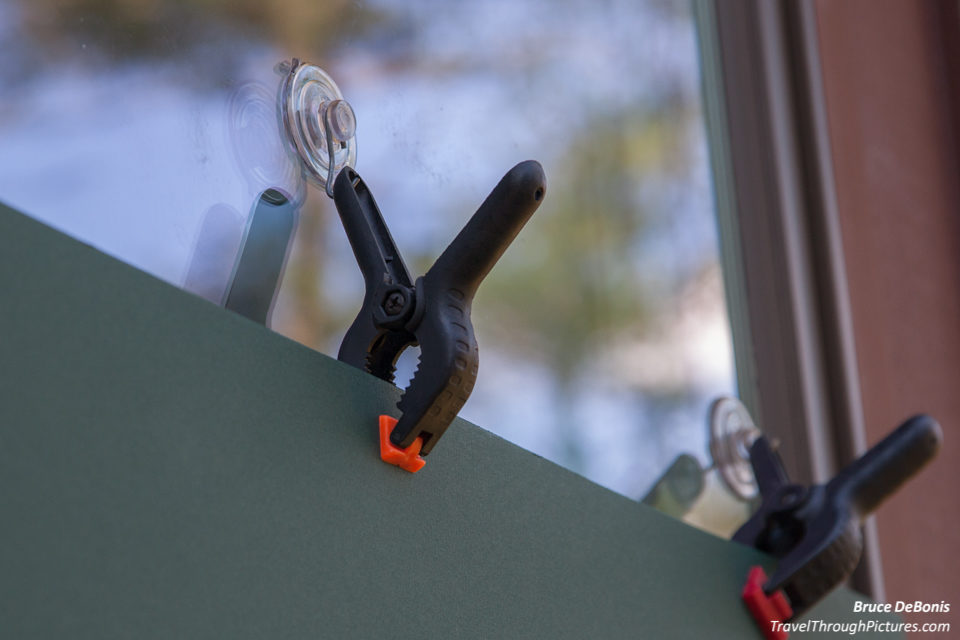
You can tape this card or paper to anything but of course, I need to make it more complicated. I used suction cups and some cheapo clamps I picked up at an auto parts swap meet. Duct tape will also work.
Why not a natural background? Nothing wrong with this but if you really want to control your shot, you will need a bush back there far enough away to be out of focus and produce a smooth, creamy background. Trees or branches can look choppy, albeit natural, and there is nothing worse than getting a great bird shot and then seeing a branch cut right behind the bird’s head ruining the look.
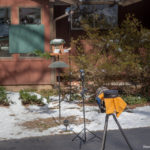
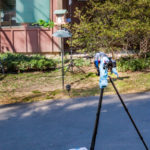
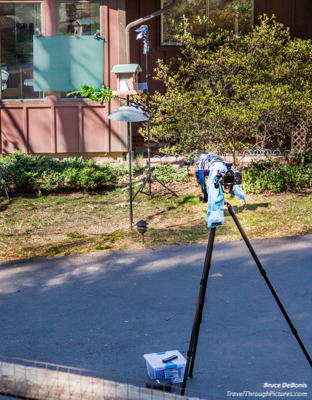 The Setup
Line up your camera, feeder, and background…. obvious of course… but you must now consider the sun. You want the sun to be behind you and a bit to the side. A bit to the side will throw micro shadows and really make the bird feathers pop.
You will discover that the sun moves across the sky!! Unbelievable I know….. Unbelievable because it isn’t true… the earth is turning, the sun is pretty much in the same spot. (I need to be careful how I write this as I don’t want a man in a pointy hat arresting me….). As the earth turns, shadows from trees and the like may pass across your shot and ruin the photos… at a minimum, the lighting will change. Note how my green background has a tree shadow about to ruin my shots.
Technical Stuff
Setting exposure: This is tough one…. I usually try a few different settings. If you notice in the picture of my setup, I have a white card (not a gray card!) jammed into the bird feeder. I use this to set exposure. In short, put the camera into manual, and set exposure so that the card is just one notch under being overexposed. Keep snapping pictures and consider the following:
- Set your shutter to 1/1000 – less than 1000 and the birds can move and blur the shot
- Set your ISO to 200 – lower numbers will yield higher quality and less grain
- Set your aperture to f/8 – you want a larger number (smaller aperture) to get more in focus, a deeper depth of field
- Snap a test shot with the white card in the shot
- Look for overexposure in the white card – turn on overexposure alert in your camera settings and anything overexposed will now blink (blinkies!)
- If there are no blinkies on the white card, then you are underexposed
- Bump ISO up one notch and re-shoot
- Open your aperture one notch (a smaller number)
- Slow your shutter down one notch
- Of the items above, if this does not get you to overexposure, keep bumping your ISO as you don’t want to go much slower than 1000 and larger than f/8
- If you have blinkies, overexposed areas on the white card, you are in luck as you can improve your chances of a good shot by
- Close down your aperture, a larger number a click or two thus giving you more of the bird in focus
- Speed up your shutter (above 1/2000 is a waste, keep closing your aperture)
- Lower your ISO, your quality will improve
- Keep experimenting until you are just one click less than an overexposed white card
 If you don’t want to use Manual because you are scared of it, or the light is constantly changing, you can’t use just the white card as it will throw off the automatic meter. Use a large grey card to dominate the shot, but have the white card in the shot but to the side for reference (it represents the white of a bird). Use Aperture priority mode and start with f/8, ISO200, and let the camera select shutter. If you are getting less than 1/1000 shutter, then increase your ISO until you hit 1/1000 shutter. You need a gray card because that will more accurately represent what your camera will try to adjust too. Then, when you review a bird shot, if the white of the bird is over-exposed, then darken the next photo by turning down your exposure compensation by a few clicks and then see what happens. To get this exposure compensation correct, you have to fiddle. Trust me here… you will get better results if you use manual mode and follow my instructions above with a white card.
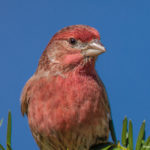
Exposure is tough because some birds have white on them and if you overexpose this, you ruin the picture. Most birds, even with white on them, have dark parts and this just makes a camera go nuts making a good exposure over the entire bird almost impossible. That is why I like to use manual and set with a white card. The white card represents a white part of a bird and setting for this will ensure you will not have any overexposed bird bits but making the shot bright enough to get good exposure on the dark parts.
Setting focus: I select a small group of center focus points in my camera menu. Do not select the full spread as the camera may not focus on the bird, but on a branch or jump to the background.
Where to stand and aim: You can stand behind your camera but you must be very still and for a long time. The birds must get used to you and your rig. Moving scares the little rats away. I now use a remote trigger, a $20 Chinese radio cheapie from eBay, so I can sit in my house, drink beer, and just push a button (see parts list below).
Regardless if you are standing there or using a remote trigger, always pre-aim the camera at that little spot you cleared on the branch. Don’t wait for a bird to land for aiming….. they land and leave very quickly. Best to just pre-aim on the little empty section you snipped on your branch and wait. You also won’t be swinging the camera and scaring the birds… they react to even the smallest of movements.
Lens Choice: I used a monster 600mm prime lens but you don’t need such a big lens. A longer lens will allow you to farther away and not scare the birds. Just take what you have and give it a go.
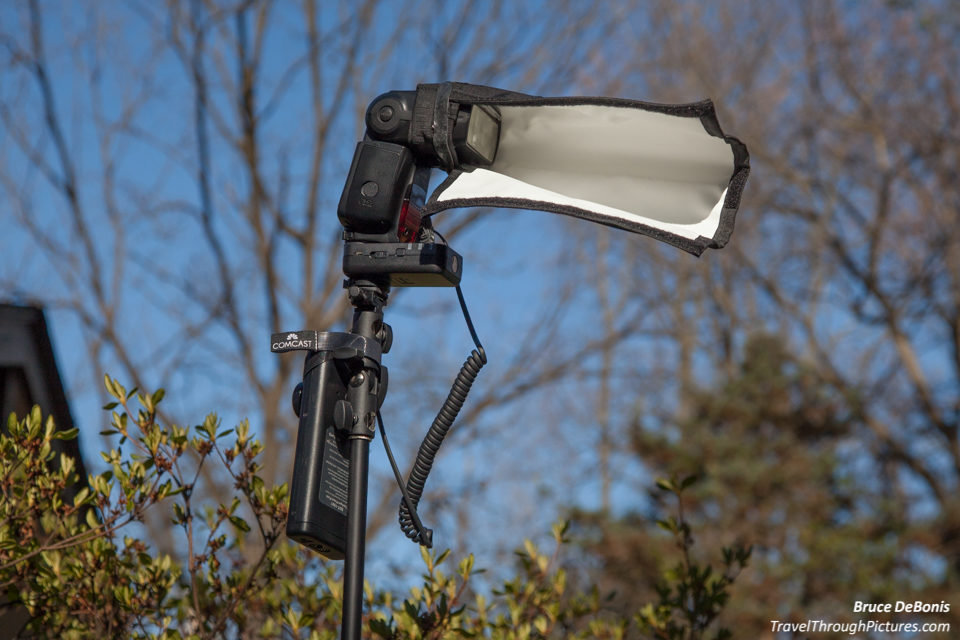
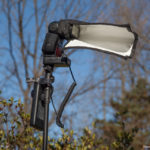
Flashes and Getting Advanced
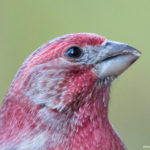
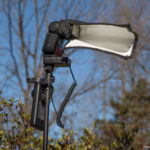
 You do not need flashes. I am only just experimenting and learning how to use them for bird photography. If you do use flashes, you will need a remote radio trigger to get the flashes into a good position (see parts list below). On one or two of the birds in the carousel above, I used what is called a “hair light flash”. This is flashed from above and behind the bird to give the feathers a glow to stand out. I found this to be very complex but you can read up on this where flashes are used for human portraiture. Good luck….. just stick to the basics before you go down the flash path.
The Equipment:
- Canon 5DSr
- Canon 600mm L f/4.0 IS II
- Gitzo 3530LS carbon fiber tripod
- Wimberley II gimbal head
- Photoolex T720C 2.4G Wireless Shutter Wireless Remote Control LCD Timer Remote
- Yongnuo YN-622C II E-TTL Wireless Flash Transceiver
- Shrub branch
- White card for setting manual mode
- Grey card for setting automatic mode

