Getting Sharp Focus – Micro Focus Adjustment – You Need This!!!
This article is technical. Get ready. Grab some beer, turn on some tunes (I recommend Jazz/Samba such as Stan Getz), and block out some time. Sorry, this is gonna hurt.
As amazing as our auto focus systems are, they can be slightly off. This is most likely due to manufacturing tolerances not being as tight as they should be. In other words, each of the many pieces in your camera involved in focusing vary ever so slightly from one another and when put together as a system, the variances in total may result in less than perfect focusing. Darn. This should not be but it is.
Well the camera manufactures put a cool feature in into some of their camera bodies that Canon calls Micro Focus Adjustment (MFA) to adjust for these variances. This MFA system allows you to adjust for each lens you own thus tuning each one to your body perfectly…. well almost…. yes even this is not perfect but it does work and works very well. After owning a few different bodies, using bunch of different lenses, and shooting for a few years, I will never buy a camera without this MFA capability. Unless of course the manufacturers improved their quality assurance processes and manufacturing specs tight enough so that it no longer matters.
Not all camera bodies have this feature but they all should. I had a few lenses that were noticeably out of focus and one that was very much out is one of Canon’s highest rated “L” lenses. Out of the box, my heart sunk when I saw the soft images coming from this very expensive lens. This experience drove me to discover MFA and MFA made this lens perfect. Now was it the lens or the body that was at fault? I don’t know but it most likely was this particular combination that resulted in less-than-stellar performance.
What if no MFA in Yo Camaré
Well you may be outta luck. Really this is bummer. You can use the moiré method below to see if your camera is focusing properly with each of your lenses, but if one is out, there is little you can do about it. Try calling your manufacturer’s customer service line for their advice. They may take your body and all of your lenses and adjust them in their lab, as will Canon. If they do, they will need your camera body along with each lens to do the tuning. The camera and body is a focusing system, and must be tuned together.
My Recommendation for Setting MFA
There are a few ways of setting MFA focus and I recommend using the Moiré Maximization method or a Total Automated Adjustment tool such as the FoCal product. Both of which I will describe in more detail below. First try the Moiré Maximization method as it is the fasted, easiest, and best way to set MFA and I explain it in more detail below. Did I say it is FREE? Update: I just created a new, free tool TTP Align Ruler that may, just may, be easier than this moire method, just click here.
For a totally automated experience, try Reikan’s FoCal tool. You plug your camera into your computer via a USB cable, set up their target, and let her rip…..click click beep click…… and after a few minutes, your camera’s MFA is reprogrammed! Woo Hoo! Why don’t I make this my number one recommendation? Well it costs money (get the automated version… trust me on this one), and it was time consuming and finicky to set up although it does work. But I can do the Moiré Maximization technique faster and with the same results (and it is free!).
Update Jan 20, 2013 – Latest Version of FoCal 1.7
I just downloaded and tested the latest version of Focal, 1.7. I was using 1.6. and this latest version behaves differently and is much less finicky than the 1.6 version. I edited my text below to reflect my experience with the 1.7 version. I must say that I am concerned about the stability of the FoCal product as the results I obtained from each version were different despite being only about 3 weeks apart, and that is assuming time is a relevant factor for focus adjustment. See bottom where I posted the differing MFA values for each version and my comments.
Update Sept 9 2013 – Latest Version of FoCal 1.9 and I’m not happy!!!
I am getting pretty disappointed with Reikan. Since version 1.8, they stopped supporting lenses 500mm or longer!!! When I run the latest version with my 500mm lens, I get a message that tells me I must upgrade to their top of the line Pro version for lenses this size!!! This will cost me about $40 more. Wha? I sent them an email questioning them about it, got an email back that said something like “we are looking into it”, and then they never responded. I sent three MORE emails to them with no response. This is just unacceptable. I did not see anything on their website denoting capabilities were de-featured. So, to adjust this lens, I rolled back to version 1.7, the last version to support longer lenses. I appears that camera shake at this length results in highly variable results and they want to use their more sophisticated analytics installed only in their Pro version (you must turn off image stabilization to run their software). Fine, but I already purchased the software with the full expectation, and functioning capability to test a 500mm lens and now they turned it OFF and are demanding that I spend more. No way …..
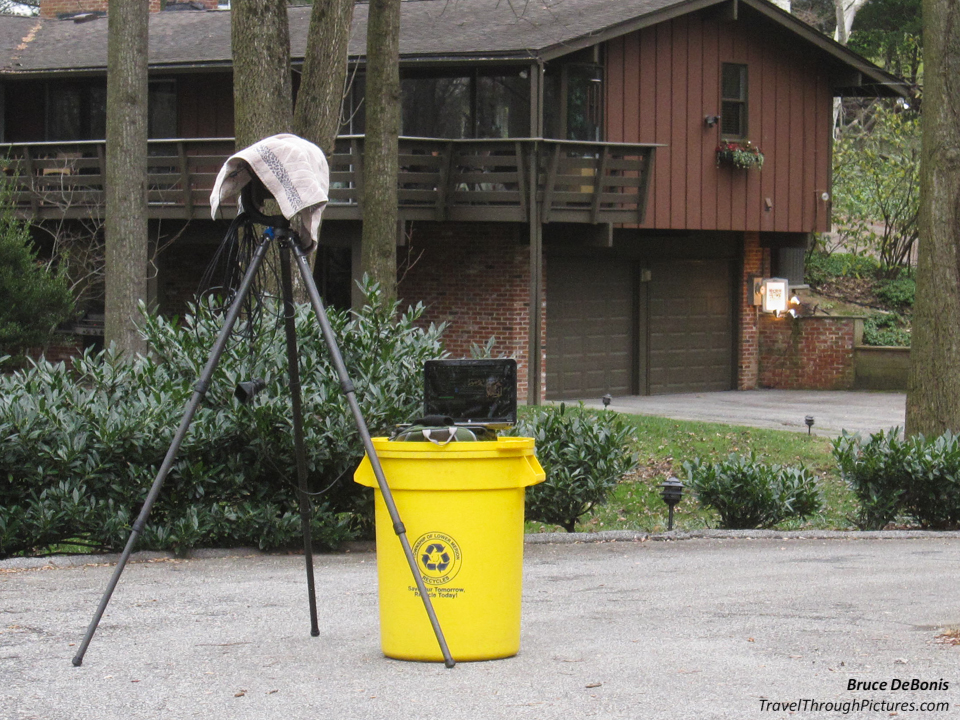
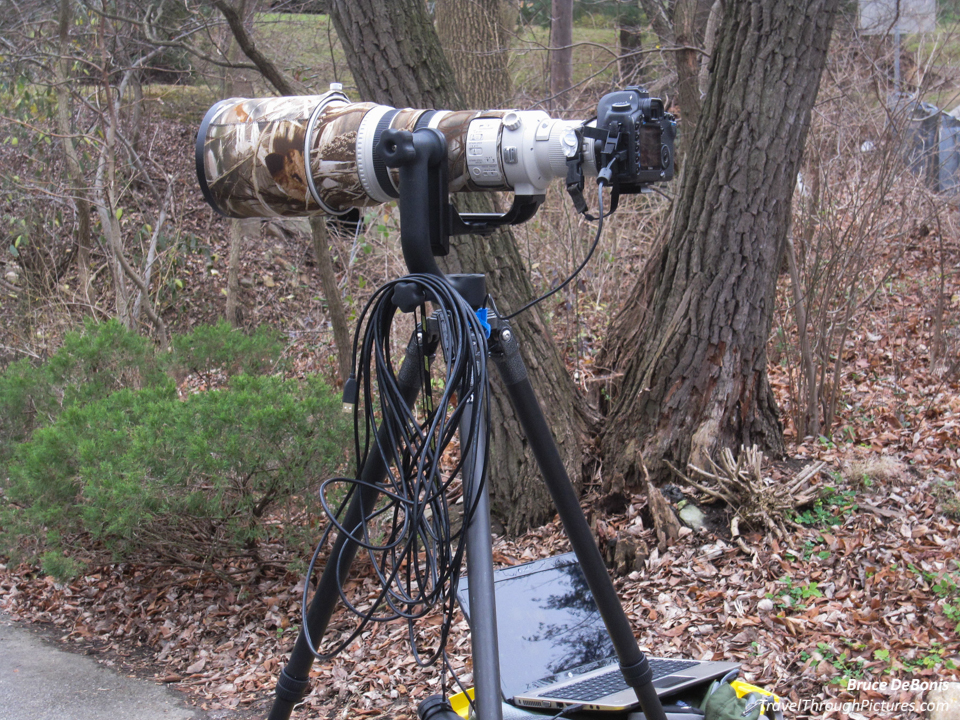
Now knowing that shake effects adjustment accuracy, I placed my camera and lens on a rock solid surface (no tripod) and covered the whole camera and lens with two very heavy winter blankets to dampen vibration. It now works much better and I get more consistent results. Anyway, this company is too immature to count on.
 Moiré Interference Maximization Method to MFA
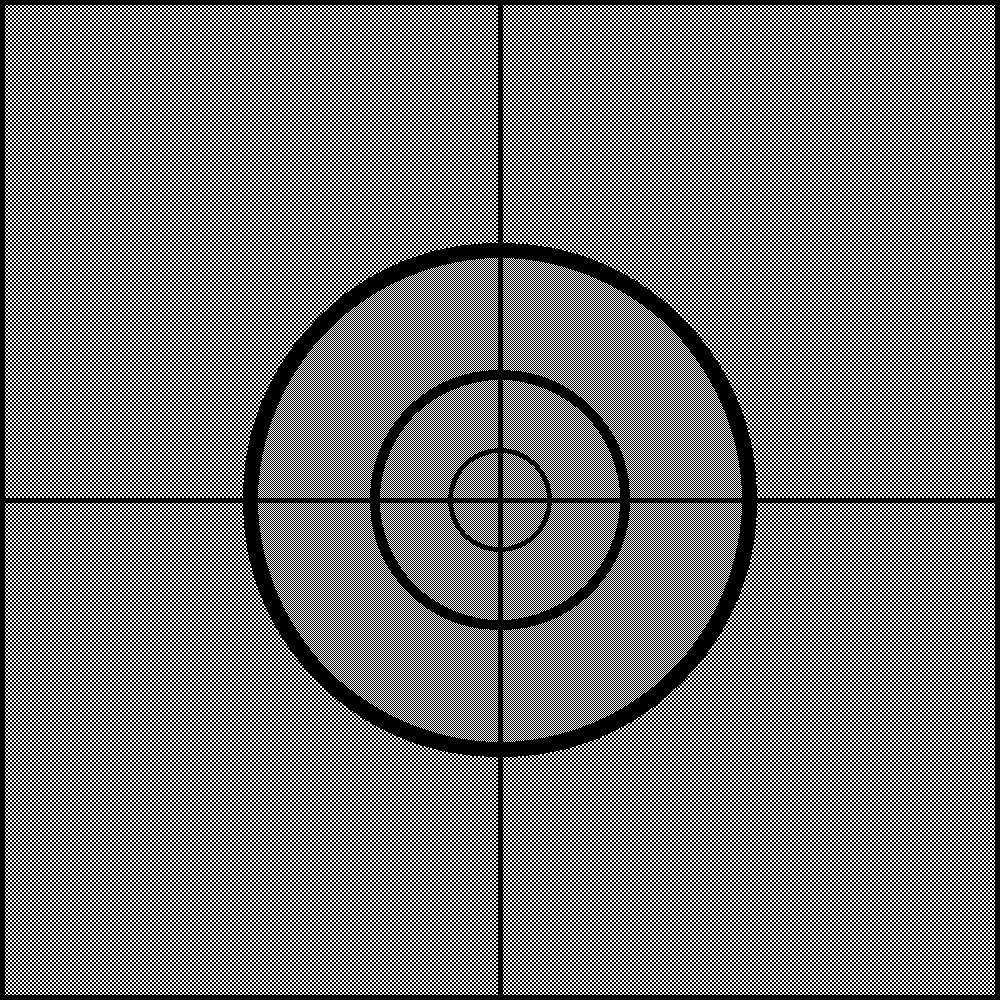
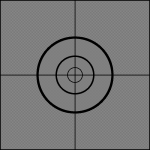
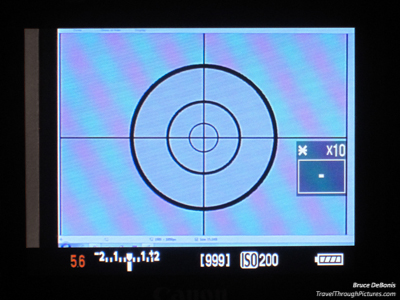
What does this mouthful mean? I am not 100% sure and I made it up! What you do is display this target (right click and save) on your computer monitor at 100% (or 1:1) size, look through your viewfinder and hit the focus button, turn on live view on your camera, and adjust MFA to maximize the weird distortions that appear on your camera’s live view screen. Repeat this a few times to ensure accuracy of your adjustment and that is it! More detailed instructions below.
What is moiré distortion? Well it is the odd shapes, patterns and colors that can appear when two digital pictures are overlaid on each other, such as when a picture made of pixels (or dots) is displayed on a monitor that projects it in pixels (or dots). If they don’t line up perfectly (they never will) but yet are perfectly in focus, you will see some odd stuff caused by false dot patterns. If your focus is slightly off, it will not allow your eye/brain system to see any false dot patters and therefore draw these weird pictures.
Click here for some really cool descriptions and examples of moiré:
http://www.archimedes-lab.org/moire_play2b.html
http://en.wikipedia.org/wiki/Moire
OK, How to do Moiré Method in Detail:
First I want to give credit where it is very due. Alek O. Komarnitsky has great instructions where I learned this adjustment method. Check out his instruction and website here. Update April 11, 2015: See comments by Russ below where he recommends an improvement to my moiré method by focusing via the viewfinder where I recommended focusing via Live View. I have modified my instructions in this blog piece to reflect Russ’s important recommendations (Thanx Russ!).
Now for some ‘Net DNA. Alek got his information Bart van der Wolf and it is Bart who designed this focusing target I am offering for download here (with his kind permission). Check his seminal thread for lots of great information here.
- Download and display this file on your computer. Right click here and save to download. Make sure you display the picture on your computer at 100% or 1:1. I found that some viewers like HP’s viewer will re-render the picture and should not be used. The best is Window’s PAINT program but most others will work. The target should look super sharp.
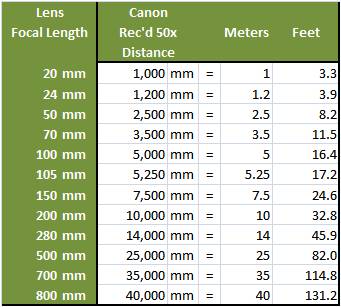
- Move the camera to a distance 50X focal length from your monitor. Canon recommends the distance from your monitor to be at least 50X your focal distance. So if your lens is 100mm, then 5,000mm or about 16 feet is your distance. Honestly I would not sweat this distance issue too much as I found about 15 to 20 feet to work with all lenses except the big 300 mm monsters or greater.
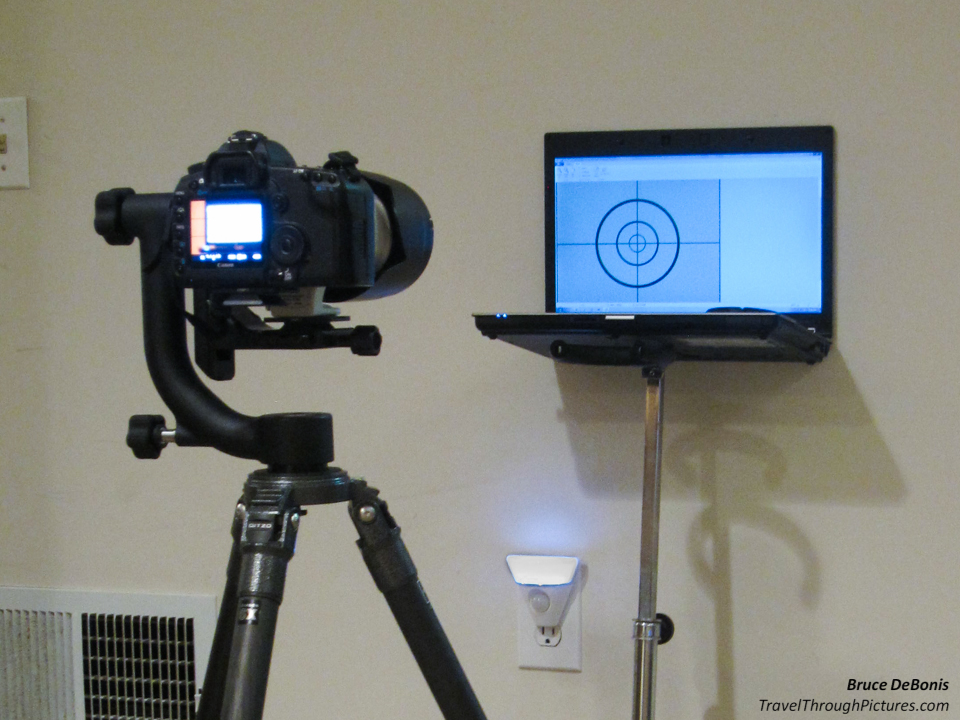
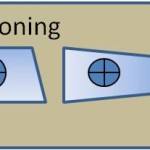
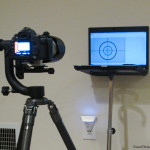
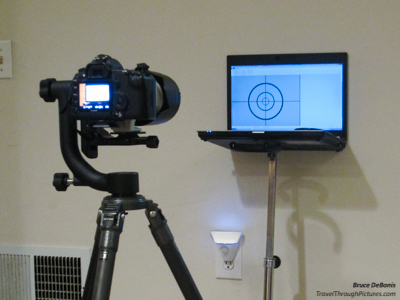
- With your camera on a solid tripod, get the camera to be as perpendicular to the screen as you can. One way to do this is put the camera into live view, then zoom x10 on the LCD and if the screen or target or whatever is not square, then you are not perpendicular… you will get “keystoning” if not correct.
- Select center point focus only. Image stabilization shouldn’t matter.
- Select a zoom length. If you have a zoom lens, choose either the widest, mid, or longest focal length. I just choose the most common length I use and spot check the other lengths.
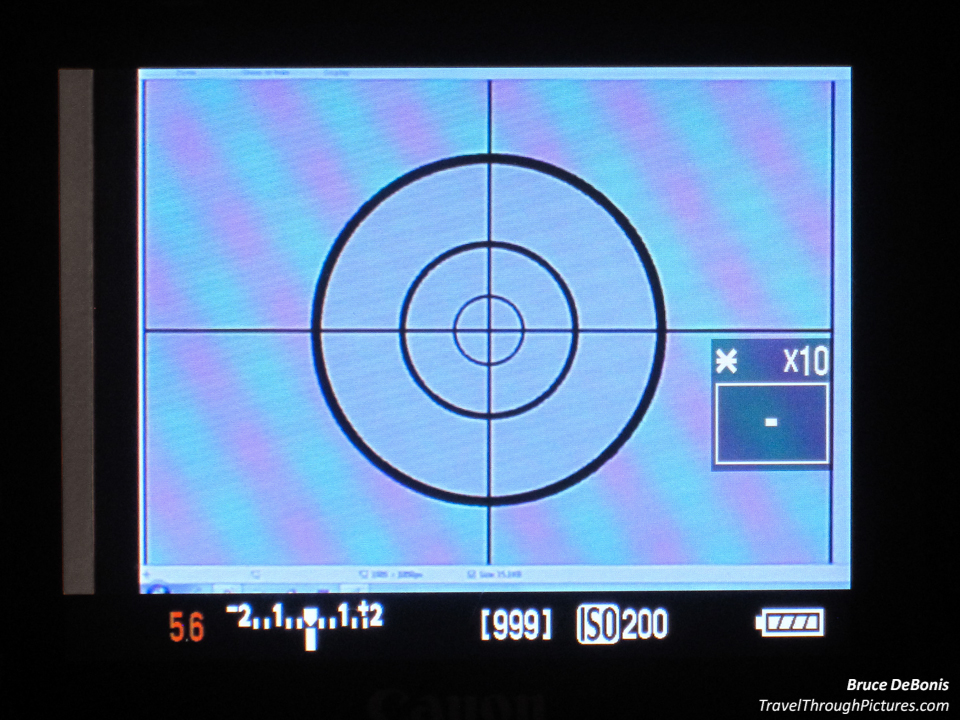
- Try focusing by hand. Set Live View to zoom x10, and then focus the lens by hand. This will give you a pretty good idea what perfect focus will look like on your camera monitor and you should see moiré pop when focus is spot on.
- Focus via the viewfinder. Just look through the viewfinder and press the focus or shutter button half way. Do not take a picture, just focus. Now release the focus or shutter button.
- Turn on live view.
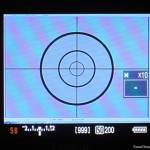
- Examine the live view image for interference patterns and adjust MFA. The image now on your camera’s live view display is the result of your camera’s focusing system. Zoom to x10 on your camera display and take a look… if it is blurry, your MFA is way out. If you are close or spot on, you will get some moiré. You can now try manually focusing the lens to see what perfect focus will look like. Now go to your camera’s MFA adjustment menu and move the slider either way, a few clicks. Shut off Live View. Refocus via the viewfinder. Redo. When you see a maximum amount of moiré distortion, you are in perfect focus and done!
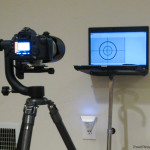
Below is a little diagram showing you how to make your camera perpendicular to your screen. I placed my camera right up to my computer screen to get the proper height, and note that I have the computer screen up against a wall to ensure it is plumb. Then pull the tripod away to your desired focus distance, and look at how the screen shows up in live view… move your rig around to make everything square.

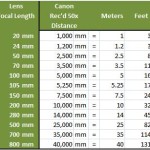
 Canon’s Recommended Distances
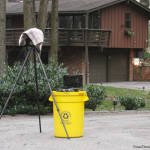
I found putting any of your lenses at around 15 to 20 feet or so works very well. For lenses over say 200 or 300 mm, you are probably going outside to get the needed distances (and use a really large screen… maybe your home flat LCD screen). Below are Canon’s recommended focusing distances for accurate MFA.
Riekan FoCal – Totally Automated WOW (but a royal pain)
This stuff is simple proof that your camera is now a computer… but with a big eye and price tag.
I won’t labor the instructions for FoCal except I will give you some tips I learned when using this product.
- Don’t buy the lowest price, manual version. Get the automated one. I found the instructions so extensive that I had a heck of a time using it. I just could not get the hang of it and wasted hours upon hours trying to figure it out. As it turned out, I had target problems but didn’t realize it so I wasted time thinking the problem was me.
- Make a great print of the target. The target must be high-contrast, sharp, not made with shiny ink as comes from a laser printer, and the paper must be matte. I took the supplied PDF file to a print shop and had them make me a few on heavy matte paper. I did this for two reasons: 1) My inkjet printer is on the fritz and does not print clearly, and, 2) I wanted a much larger target to use on my 500mm lens and teleconverter.
- Beware of the Camera not resetting. When FoCal does its thing, it re-programs some of your camera’s settings such as mirror lockup. When it is finished, it restores your original settings. However, if for some reason the session is aborted, then the settings will not be restored. The software is designed to recognize a failure and when restarted, will ask you if you want your last session’s setting restored (click yes!), so there should be no problems. But of course, lucky me, I did. I don’t know why the session was aborted… maybe the computer went to sleep but it did happen. When I went to shoot eagles the next day, I thought my camera malfunctioned and I freaked out. I was really upset until I figured it all out and reset the camera by hand (mirror lock was ON).
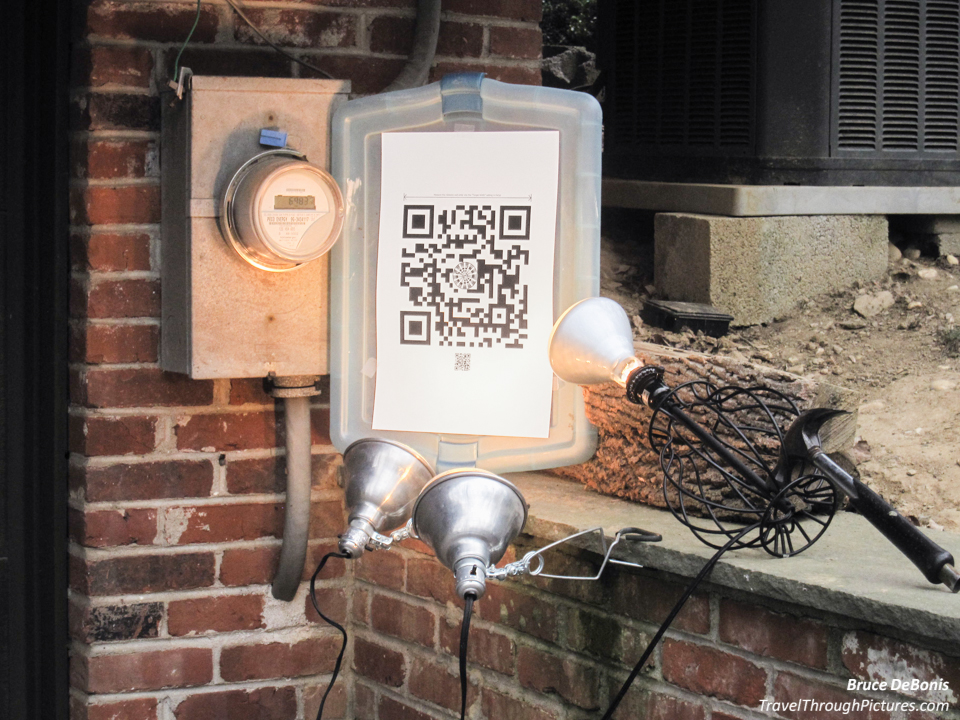
- Make sure the target is well and properly lit. Boy is this one item important. If there are florescent lights around, shut them off!! They flicker and will wreck the test. Sunlight, bright sunlight is the best light for the target. I had indirect sunlight on an overcast day so I augmented it with two floodlights from tungsten bulbs. Again, I wasted tons of time thinking my lighting was fine but it wasn’t.
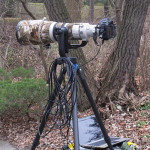
- You will need a larger target for long lenses. I have a 500mm lens and with the 1.4x teleconverter, I get 700mm of length. This requires, per Canon’s recommendation, the camera be 115 feet away from the target. You are going to need a larger target for this. FoCal didn’t respond to my question about how large of a target is needed for a 700mm lens, I just had the printer print the biggest that was reasonably priced, and entered the size into the computer software. It didn’t work that well and I received warnings and errors from the software. So back to the printers (Staples this time) where I printed the target on 24″ X 36″ paper… only a target of this size would yield results without FoCal giving me some sort of error or warning message (about $6 to print one at Staples).
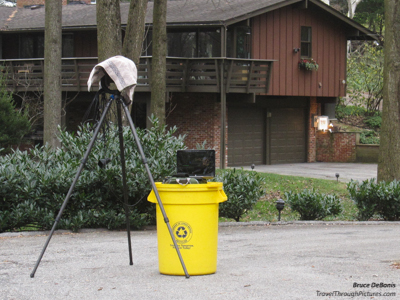
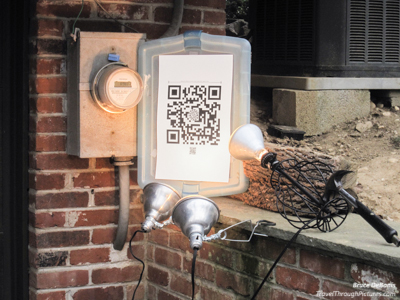
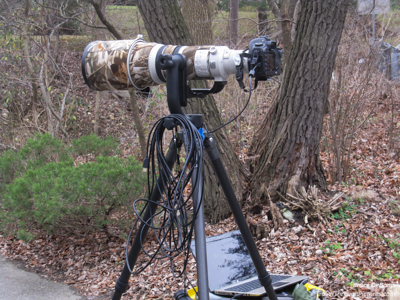 So while FoCal works and is super cool, you can see why I recommended the Moiré Maximization method over this automated method. I found this thing a pain to get working properly. Version 1.6 was very finicky but version 1.7 drives a more solid test with less variability (but then I obtained differing results with the newer version). Now to be fair, everything I discovered and tripped over was already described in the manual… but boy they weren’t kidding. Follow the manual to the letter and then some. Oh, and buried in the manual is a list of the camera settings the tool reprograms to operate should you need to reset your camera from a failed test (I did).
By the way, one of the hidden advantages to FoCal, is that it may discover other problems with your lenses. For example, when I installed my Canon 1.4x teleconverter between my 500mm and camera body, FoCal had a hard time making the MFA calculations and produced inconsistent results when I re-ran the test. I may have a “de-centered”, or out of adjustment, teleconverter. I never liked this teleconverter and could not figure out why folks on the ‘net get pretty good results with it (no comments about my lack of talent please). So, next week I am taking it to Canon’s service center for adjustment. Look out for my report on the results of this adjustment.
Update Feb 11, 2013 – 1.4x teleconverter back from Canon
One hundred or so dollars later, they tell me the teleconverter is fine. Well that was a waste of my money. So I reran the tests and still get many FoCal errors and warnings. So I went to Staples and printed the target on 24″ X 36″ paper and finally, I got results without errors. But again, the results were not consistent with most tests yielding a -5 MFA but some a -6 and one a -2.
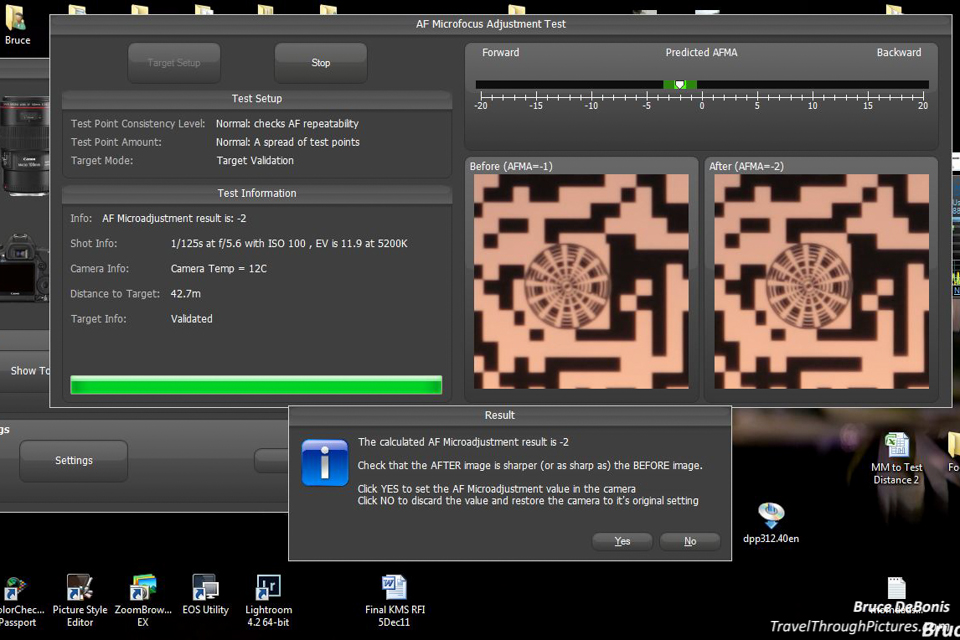
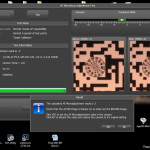
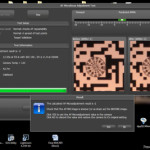
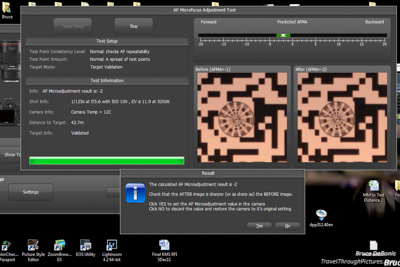 Left is a screen capture of my computer showing the FoCal tool in action. You may be able to see it more clearly in the larger photo above. But it is telling me quite a bit of information in that I had the camera set at -1 MFA and it is now recommending -2 MFA. You can see in the before and after pictures of the target what 1 increment in MFA can look like. The small green indicator above the two targets show the green indicator is small…. it can be wider…. and therefore the tests provided very consistent results. If it was wider, then there was inconsistency in the test runs and either something is not right with your system, or you did not do a good job of setting up the test. If you are a geek with plenty of time on your hands, this is one cool tool. So if this screen doesn’t freak you out, just remember the Moire Maximization method is free… and a bit faster when you consider set up and tear down of your test environment.
Mixed reviews on FoCal from the field
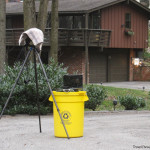
I shoot eagles at a very popular spot for photographers and therefore there is no shortage of expertise there (either perceived or real!). These guys demand sharp focus and virtually all do MFA like a religion if their bodies have the feature. Many have FoCal and some show up with their targets and do adjustments right along the river’s edge. I calculated the reviews on FoCal to be about 50/50 with raves on one side and confusion and disappointment on the other.
My MFA for Each of My Lenses and Lens Combos as Calculated by FoCal – I am Concerned!
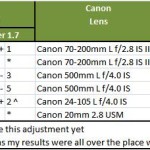
Below are all with my Canon 5D Mk II:
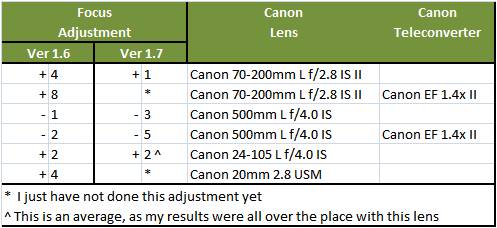 I am shocked and disappointed with the differing results obtained with the newer software version. I really don’t know what to make of it. The tests run with the new version were better in some cases as the 500mm runs were solid, no errors, and returned the exact same result each time. I repeated the test about 10 times. The 70-200 yielded the same solid results and I even tried differing zoom settings. Everything was pointing to version 1.6 being a problematic program, but then I ran the 24-105 and the results were all over the place. The +2 in the cart above is just an “eye ball” average. I ran the tests with the new software outside of my home to get great light. I then moved the test indoors and repeated the 24-105 tests at shorter distances and with tungsten flood lighting. Same… all over the place. I tried differing distances, differing zoom settings and indoor and outdoor lighting. Hmmm…. What do you think? Send me an email with your opinion and results. I just ask that you re-run the test at least three times with no change in the test environment.
So, was the 1.6 version a bad program with the 1.7 being solid and it discovered I have a flaky 24-105 lens? I wonder if the folks that rave about FoCal are re-running the test to check for consistency.
One more thing I discovered through the 1.7 version: If you have a long lens, say over 200mm, you will not be able to use the provided target printed on an 8.5 x 11 standard paper sheet and shoot at Canon’s minimum distance of 50x lens length. I would occasionally receive a ” lost target” or some message like that and I could only run the test by moving the camera closer… and I had an enlarged printout. My bigger question is simply this, “do you want to spend this much time dealing with MFA?”
Other ways to set MFA
- Brute force: Take pictures of a sharp, contrasty target, look at the results on your computer, tweak your MFA, reshoot, repeat until you get bored, or nail it. I originally adjusted my 500mm lens this way by lining up staggered spray paint cans about 150 feet from my camera. That is when my neighbors started hiding the kids and pets. A modification to this method is just shoot a shot at say, every 3 increments in the MFA scale while noting the picture number and the corresponding setting. Then download them onto your computer and see which shot, and therefore setting, yielded the sharpest results.
- Brute force with a tool: Leave it to the market to produce a tool to help. Products such as the popular LensAlign get great reviews and make the brute force method much easier. I will tell you that you can make your own targets as well but this fancy tool looks great. Update: I just created a new, free tool TTP Align Ruler that may, just may, be easier than this moire method, just click here.
- Send your camera and lens(s) to Canon or Nikon: You can send your body and lenses into a service center and they will do the adjustments for you. You must send both the lens and body together as focusing is a system, not just a lens or body. I have not used this service but I have spoken to some who have and their feedback was spotty. I say why bother when you can do it yourself for free and not have to give up your camera and lenses for a few weeks?
The Equipment for Moiré Method:
- Canon 5D MkII
- Manfrotto 190 CXPRO4 tripod
- Manfrotto 498rc2 ball head
- Gitzo 3530LS carbon fiber tripod
- Wimberley II gimbal head
- All my lenses
- Laptop PC; larger screens are better
- Focus Target
Additional Equipment for Reikan’s FoCal Software
- Same camera, lenses, tripods and PC in above
- Reikan’s FoCal Software
- Printed FoCal target from supplied PDF target file
- USB to mini-USB cable (usually supplied with your camera)
- Supplementary tungsten lighting for target
- Patience and tenacity

