


How To Photograph Hummingbirds 1 of 2 (No Flash)
Don’t you want to take a great photo of a hummingbird? I always did and am proud to have done it. This blog article is the first of two:
- How to shoot hummingbirds in natural light without a flash (this blog piece)
- How to shoot hummingbirds with flash (Click to go there)
Keeping with my “how to” for amateurs blog theme, I decided to post these not-so-great pictures. They are not great if you are an editor of National Geographic, but for an amateur hack like me, they are really cool and I am proud of them. I was just getting into photography again and was pretty clueless so these pics are proof that you can do it too! Shooting hummingbirds is not hard but you do have to do some prep work and planning. I will try and keep it short, cut out all of my trials, mistakes, guesswork, and just let you know what worked for me so you can duplicate this setup very quickly.
Canon XTI – My first DSLR
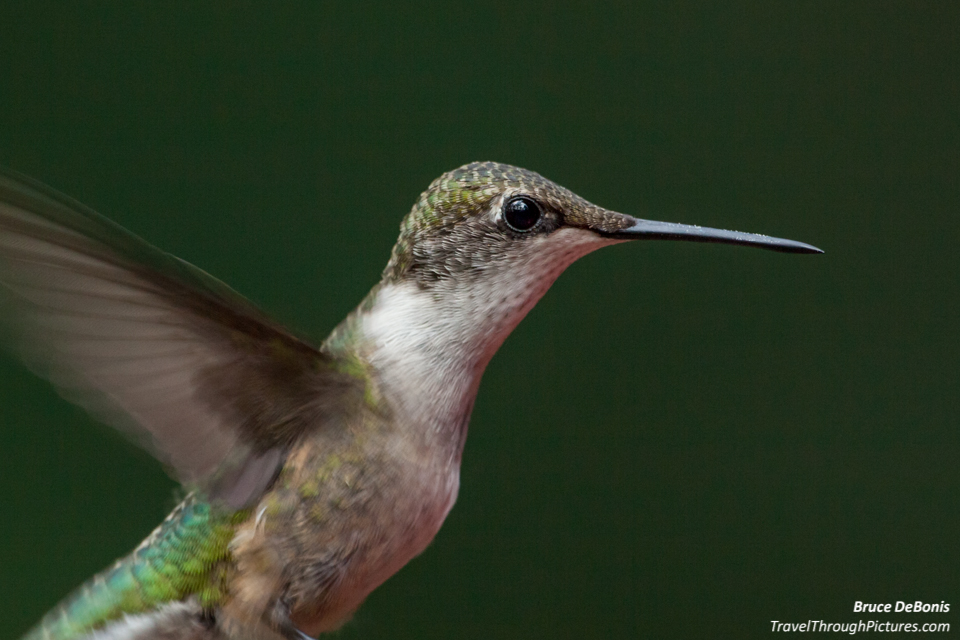
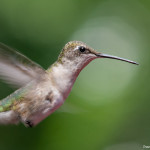
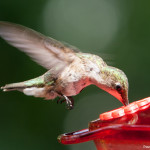
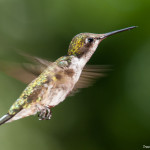
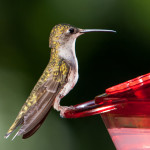
The pictures here are from my first attempt at shooting hummingbirds that goes back four years ago to 2009 when I had my first DSLR, a Canon Rebel XTI. The XTI was a 10.1 megapixel consumer camera and was Canon’s third generation of inexpensive digital SLR. I thought it took good pictures but you had to nail exposure just right. High ISO performance was not very good but I did very well with this camera and it got me into photography again.
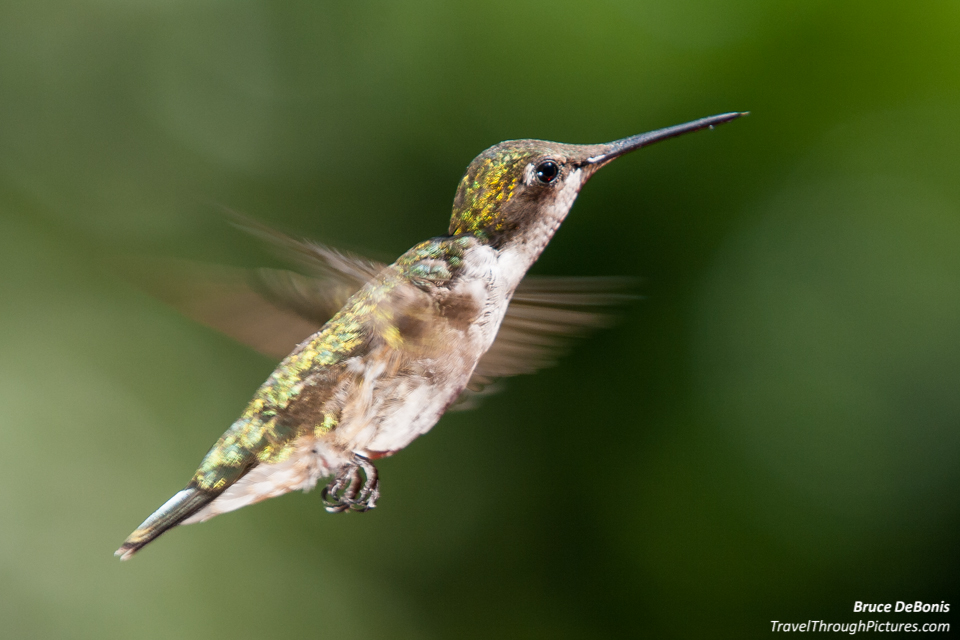
I knew the camera’s image quality was not up to professional status, so I moved to the Canon 5D Mk II when it came out and I have been hugely satisfied with that 20.1 megapixel masterpiece. Newer cameras are not only better than older ones, in my opinion, ALL of the current DSLRs take great pictures regardless of the price. If you have a new DSLR, you should get better results than I did above.
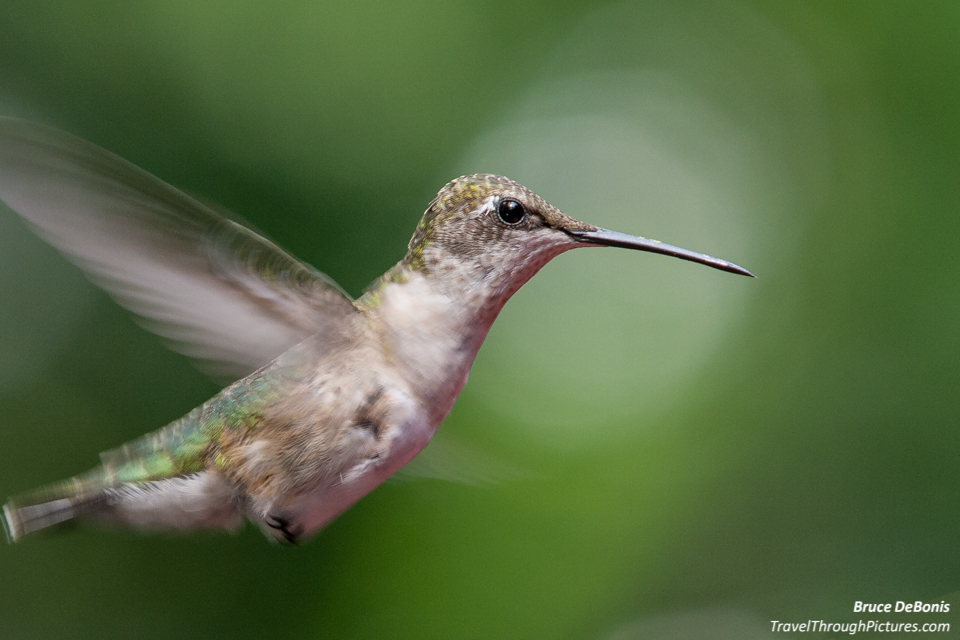
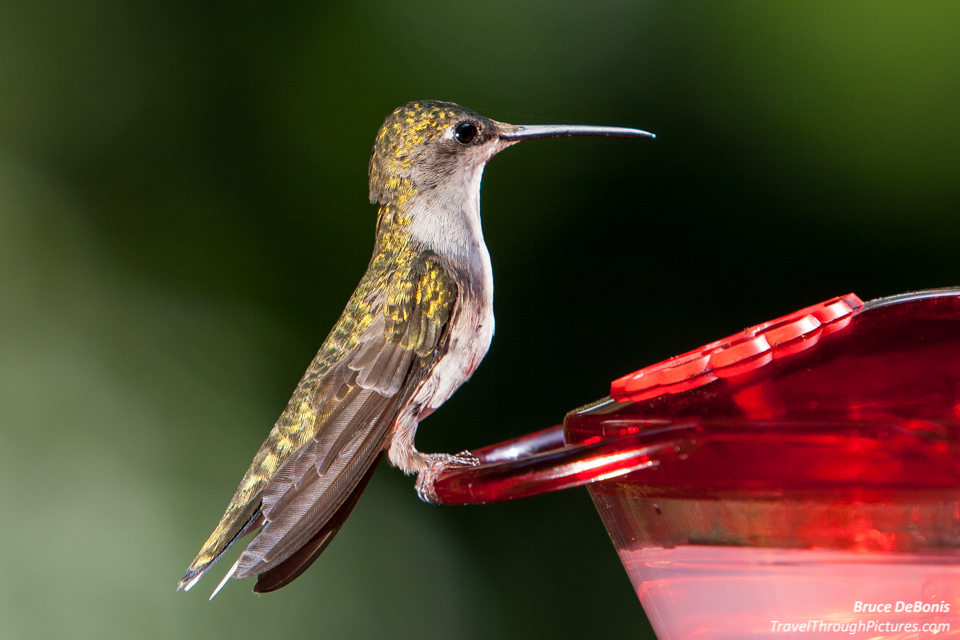
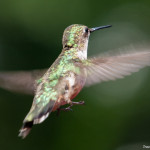
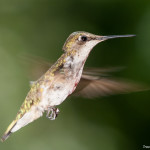
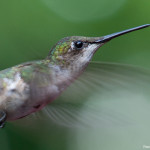
The last picture is actually taken with my then new 5D Mk II and without a flash. Notice the quality difference between the older consumer XTI and this more modern professional model.
Hummingbirds – To freeze or not to freeze the wings
The first question you must ask yourself is do you want to freeze the wings or not. If you want to freeze their motion, you must shoot them with a flash. Forget about upping your camera’s shutter speed as you just won’t be able to do it. You will need a ton of light, a shutter speed of at least 1/6000 of a second, and a slightly closed down aperture to get the bird in focus. This is a mission impossible.
In my next blog article, I explain why a flash = speed and go into more technical detail on how to shoot hummers with a flash. At the time I took these pictures, I had no idea what I was doing and figured I would use natural light to do it.
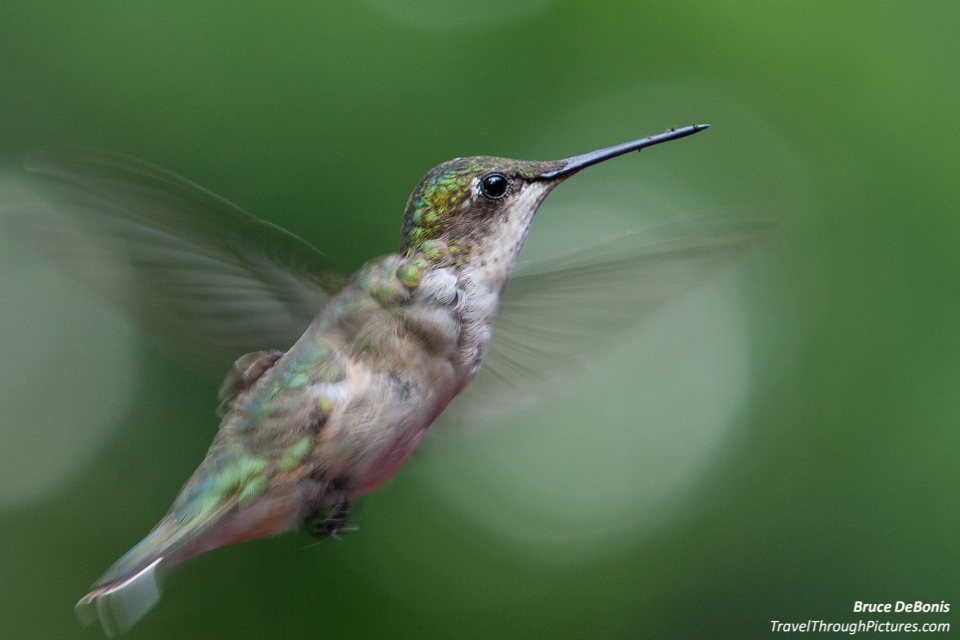
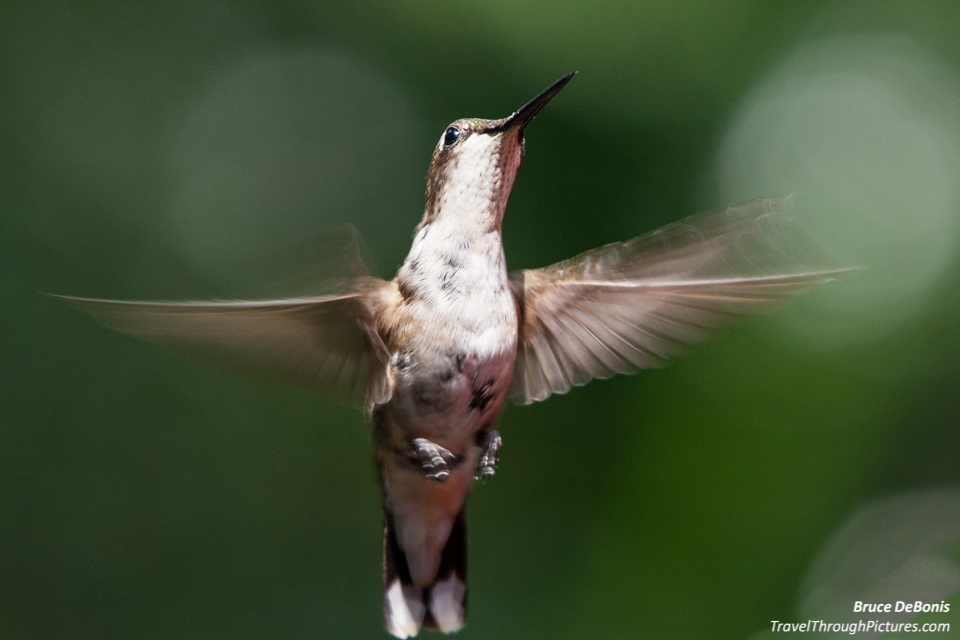
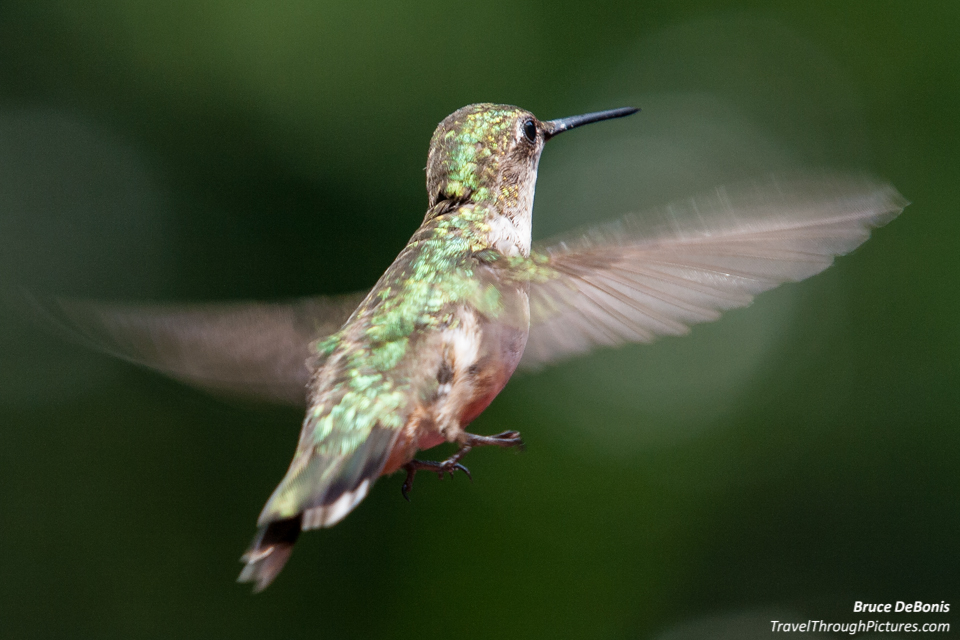
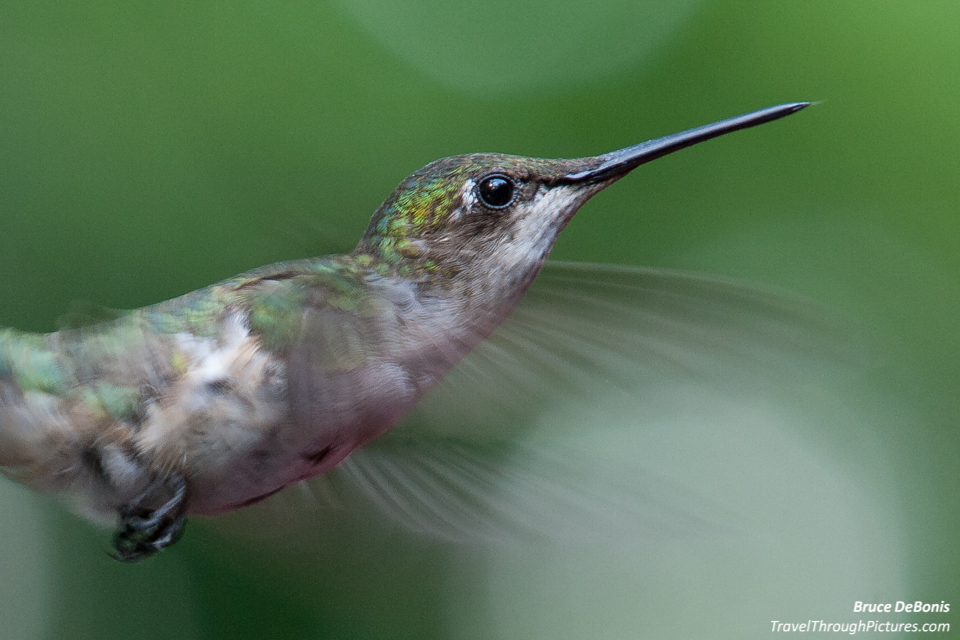
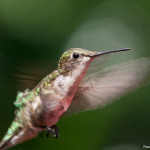
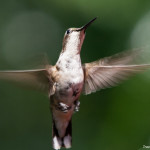
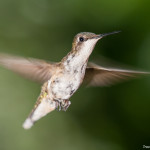
There is nothing wrong with using natural light to shoot hummingbirds. The blurred wings you will get do not look bad and convey a sense of motion. That motion is really happening and the blur is what we really see anyway.
The Hummingbird Studio – This is the most important thing of all!!!
Sorry I don’t have any pictures of my “studio” as I never thought I would have a blog back then. You will need the following:
- A Bird feeder
- A location that allows for a nice background and direct sunlight on the bird (no back or side lighting!)
- A mirror to reflect even more sun light on the bird (I rested the mirror on a chair that I could move around)
- A tripod (I just can’t hold a camera steady enough or up to my face for as long as it takes to snap hummer photos)
- A zoom lens (I shot these at 200mm)
- A ton of patients as you will have to sit motionless
- Birds
Put the feeder up a week or so before shooting and locate it where it will be for the shoot. The birds learn where to find the feeder. Hummers are more likely to use a feeder if it is near bushes where they feel safe. Stake out where you will sit, where you will place the mirror to reflect even more light, and ensure the shooting angles will yield direct sun on the birds and a nice, distant background.
Regarding the mirror, I placed a nice sized two foot by three foot hall mirror on a chair and angled the reflected sunlight up to where the birds would be. The direct sun light and reflected light from the mirror resulted in a double hit of light on the bird and ensured no shadows would appear. Some of the hummer shots above do not have the addition of the mirror. The ones without the mirrored light look duller than the others. I didn’t think of using a mirror until the next day and it improved the look and detail of the bird shots.
When you are ready to shoot, block off all of the unnecessary feeder ports by laying a leaf over them. This will drive the hummer to fly in a limited area where you will capture a winning shot.
Bird Behavior – Watch carefully and predict
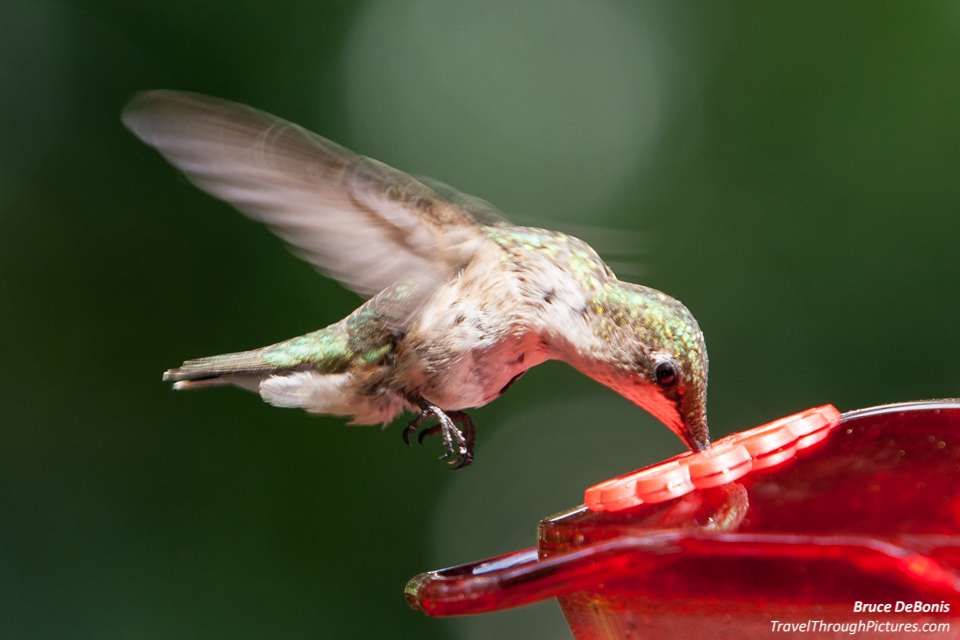
The hummers will usually stop about a foot or two in front of the feeder and float while they check it out before landing. This is when you nail ‘em! They don’t float directly in front of the feeder, but just to the left or right of it. I don’t know why, but maybe it is because they can’t see perfectly straight in front of themselves.
If you want to catch the bird directly side on, then put the feeder port perpendicular to your view. If you want to snap the bird’s belly with a more direct shot, then turn the feeder about 45 degrees away from your view.
Catch the color – Get the light sources behind you
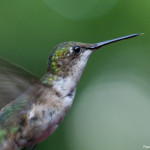
The brilliant colors on a hummingbird appear when the light source is behind you. Get the sun and mirror both shining as directly at the bird as possible. If you get the light correct, you will not only see the red gorget of the male but the female’s back and body light up with green and yellow. Really neat!
The male hummer has a beautiful red neck and female has shiny green and yellow on their bodies – at least that is what it looks like to us. It actually has no color but the feather spines are so tiny, they refract the light just so and we see color. But if the light does not hit the bird at the correct angle, you won’t see the shiny colors as in some of my photos above. Unfortunately, I didn’t nail any male hummers in this batch.
Camera Set Up
You are going to have to put your camera into manual mode for this. Anything automatic won’t work as the birds are too darn small to effect the metering properly.
I recommend the following manual settings as a starting point:
- ISO: 400 or 800 – If your camera is more modern and the pics look good and noise free at 800, then use this higher ISO.
- Aperture: f/7.1 – Ideally, you will want a more closed aperture (higher number) to get a better depth of field and a higher probability of getting the bird in focus but start here. If the bird is too dark, open this up a bit.
- Shutter speed: 1/250 or faster – The hummer will float stationary a moment before landing and therefore you don’t need a super high shutter to get a decent picture. Don’t go much below 1/250 but faster is better to help freeze the body.
- Distance – you want to be close but not close enough to scare the buggers away. Try about eight to ten feet away but you have to stay statue still. You will have to crop in software later so don’t worry too much about it.
- Focus points – Try setting your camera to use all of them or a concentration in the center if your camera can do this. If the camera is slow to focus or starts focusing on background items and not the bird, then switch to center point only and aim carefully.
- Shutter focus – Your camera should be set this way from the factory, but if you use back button focus, turn it off as you will need the focus speed from a single finger action.
- Shoot Raw – These birds are small and no matter how close to the bird you can get, you still will crop heavily and Raw will preserve all the detail data.
Getting the Shot – SIT STILL!!!
If you move, the birds will not come to the feeder. You have to hold the camera to your face, a tripod helps here, and you wait motionless. This is what separates photographers from lesser pedestrians. It is not the technology or how much money you spend, but it’s all about how tenacious and determined you are to get a darned good photograph. If you had the feeder located in this place for a few weeks, the birds will be more likely to ignore you as they appear to develop a habit of returning to known food sources.
Aim the camera at the feeder port, press the shutter halfway down to get a pre-focus, and release. This will set the lens to very near the real focus point so the camera will focus faster and have a better chance of locking onto the bird and not wander off and grab the background.
Now think about the beers you are going to drink when this is all over. This is the painful part. Waiting…. and waiting….. and dreaming. PAY ATTENTION!!! There is one!!! Don’t PANIC!!!! ahahhahahah…!!!!!! Ok, you blew it. Keep trying.
Tips and Tricks
Camera noise can scare the birds. My 5D MkII is too loud and scares them so I wrapped the body with a thick towel to muffle the clicks. But you can use this noise to your advantage. Once the bird lands and feeds, it will take off fast and there is no way to grab a photo then. You have to snap when the bird is floating and checking out the feeder. But, as soon as the guy lands, snap a shot. The camera noise may be just enough to get him to jump up and float again for another snap. If too loud, the guy will buzz away and you will need to muffle the camera; but just a little noise can be an advantage.
After a few good shots, leave your equipment and go inside and relax. This gives the birds an opportunity to feed without being disturbed and keeps them coming back. Also take your memory card in with you and check out your haul of pictures. Then adjust your camera if necessary to improve the exposure.
If your bird is too dark, make sure the mirror hasn’t lost the target. That darn sun moves in the sky so you have to constantly adjust the mirror. If the mirror is OK, try slowing down the shutter. If you are below 1/250, then open the aperture a bit.
If the bird is too bright, then speed up the shutter and or close down the aperture. If you are getting good focus, then speed up the shutter.
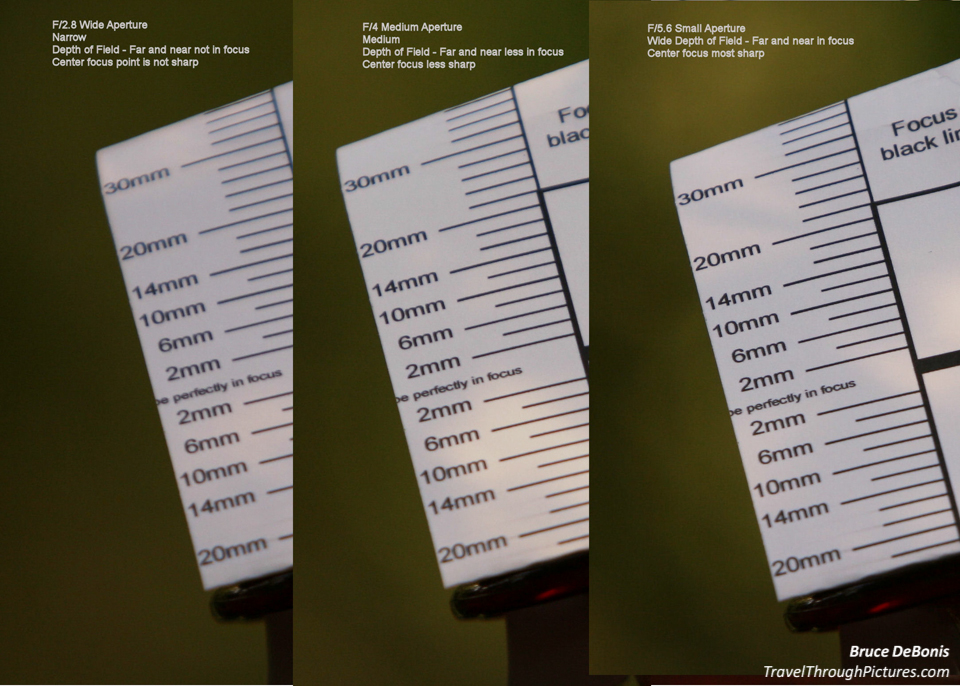
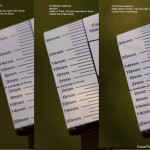
Depth of Field
One of the pics in the carousel above is a composite where I shot a target using three different apertures. This gave me an understanding of what these f/stops do to focus depth. Notice how a more closed aperture (higher number) starts to bring out the detail of the background while it increases the focus depth. Increasing the focus depth will help increase your odds of getting a bird in focus.
A Note About ISO
Ideally, you would want to push your shutter really fast to avoid any blur from bird movement and set your aperture really closed (higher f/number) to improve depth of field. Doing both of these things will improve the odds of getting good shots but requires way more light than you will have available. A way to “get more light” is to bump up your ISO on your camera. This will make your sensor more sensitive to the available light (it actually increases amplifier gain) and you can then increase shutter and close aperture. However, higher ISOs introduce digital noise and other negative things that I can’t describe. High ISOs just don’t make good pictures to my eye. BUT…….. High ISO performance is one of the areas that camera makers are working hard to improve. With each generation of camera, we get better ISO performance. So….. if you think your camera does higher ISOs well, then by all means, bump up your ISO to 1600 and beyond. I rarely if ever shoot my Canon 5D Mk II over 800 ISO and keep it at 200 for most shooting situations. As technology moves forward, your mileage may vary so don’t be afraid to experiment with higher ISOs. You must learn your camera to get the most out of it.
The Equipment:
- Canon XTI DSLR
- Hall mirror
- Canon 70-200mm L f/2.8 IS
- Manfrotto 190 CXPRO4 tripod
- Manfrotto 222 pistola head
- LightRoom 5

