


How to Photograph Fireworks – Tips – Oooo! Ahhhhhh!
Getting some great shots of fireworks has always been on my photo to-do list for many many years. I just never could nail any good ones – until now. Here is how I did it.
Beer is a requirement for firework photography – Proven by science!
Shooting fireworks goes hand in mug with beer. Losta beer. It’s July 4th, you will be at a party, surrounded by friends, and you will be drinking beer. Face it, you will be taking your fireworks pictures all beered-up. Therefore, I recommend that you stop reading now, grab a cold six pack of your favorite (I recommend Pilsner Urquell), and only then read these instructions because you’re gonna need it.
See, science has discovered an interesting phenomenon called “state dependent learning”. The eggheads in our universities and labs discovered that you will remember more stuff if you are in the same mental state as you were when you learned it. Cool eh? So, if you are going to be all beered-up when you take pictures of fireworks, you need to be beered-up to learn about it.
Conversely, if you are going to be beered-up when you learn, then you need to be beered-up to shoot the photos. I like this. One requires the other….. just magical.
But I always understood the relationship between beer and good photography; click here for a deep analysis of this holy link. Ok, ready? Go ahead, crack open another.
Select a good location
Duh! Like you’re going to shoot fireworks from your basement. But there are some real things to consider such as the wind. You want to be upwind or at least anywhere on the windward side of the fireworks. Fireworks produce huge smoke clouds that will ruin your shots if they get between you and your target. I think the best place to be is perpendicular to the wind so the smoke blows left or right leaving you a clear shot to the explosions and a black sky behind. And don’t get too close or you will be aiming up.
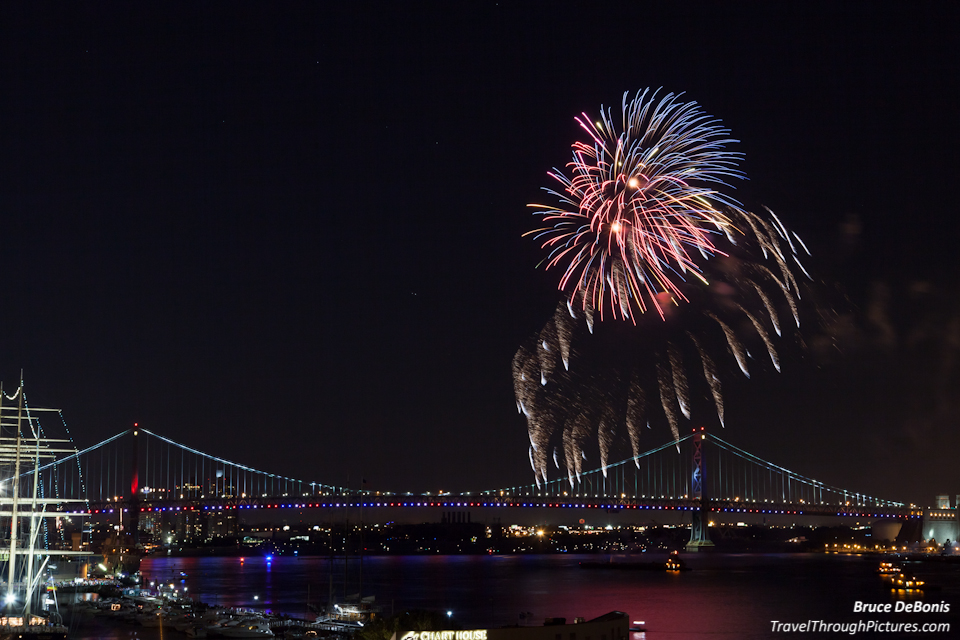
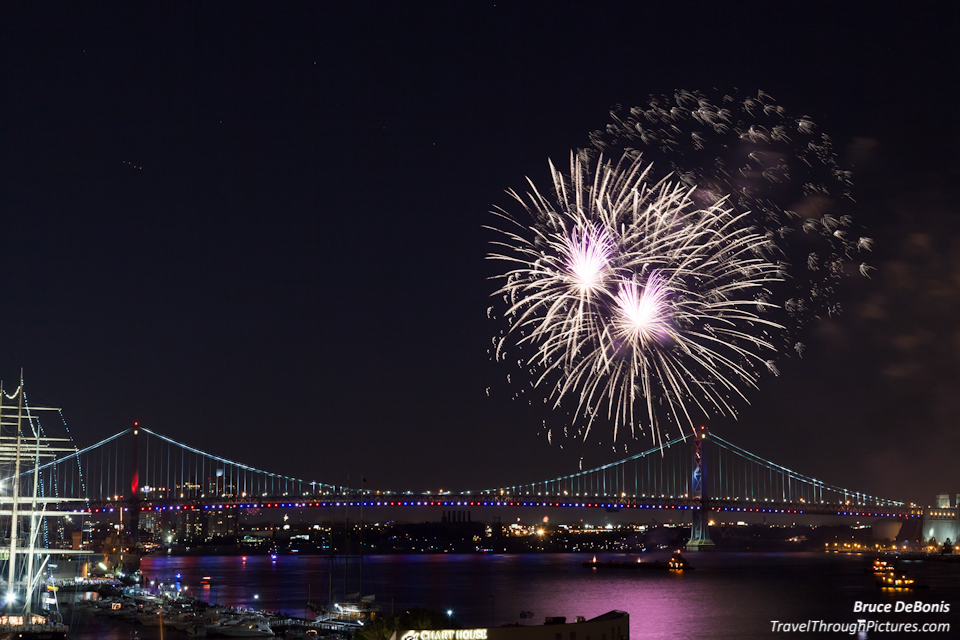
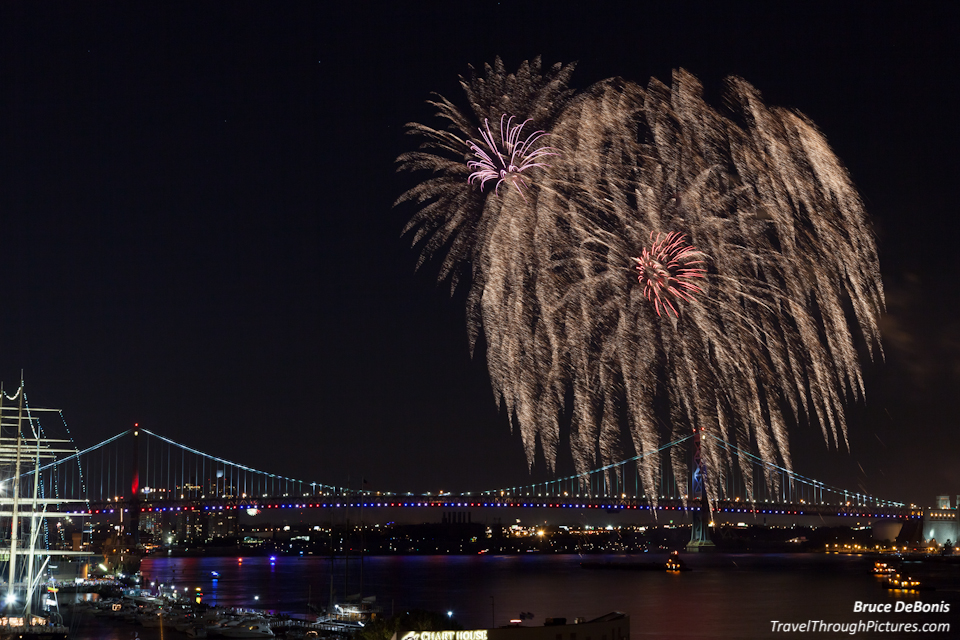
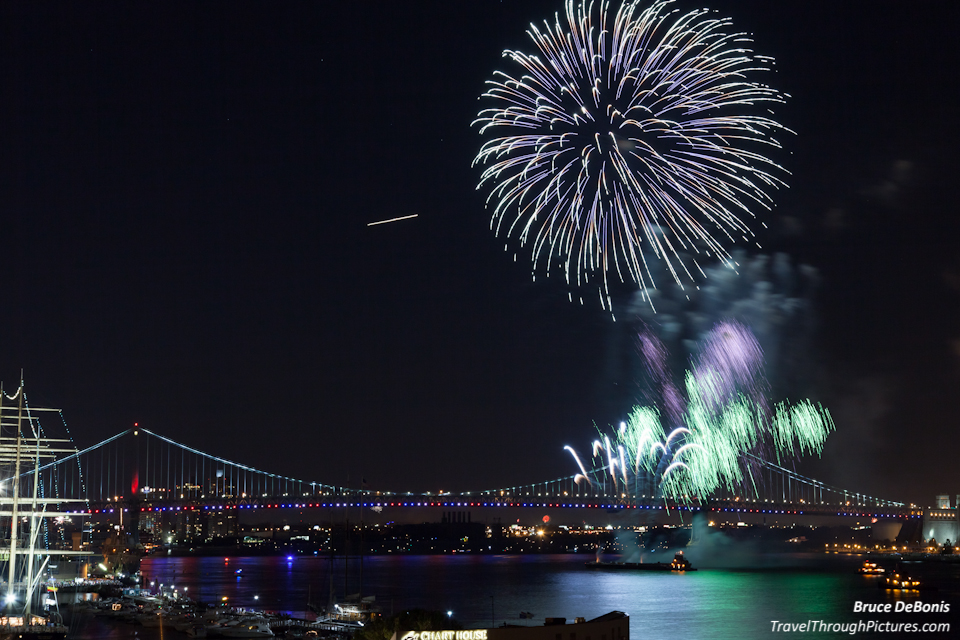
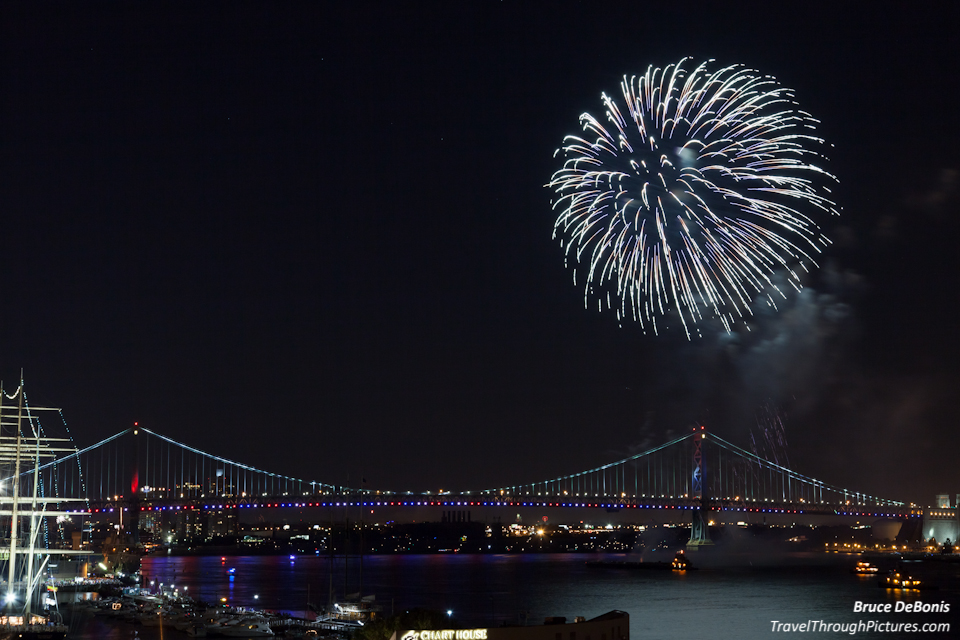
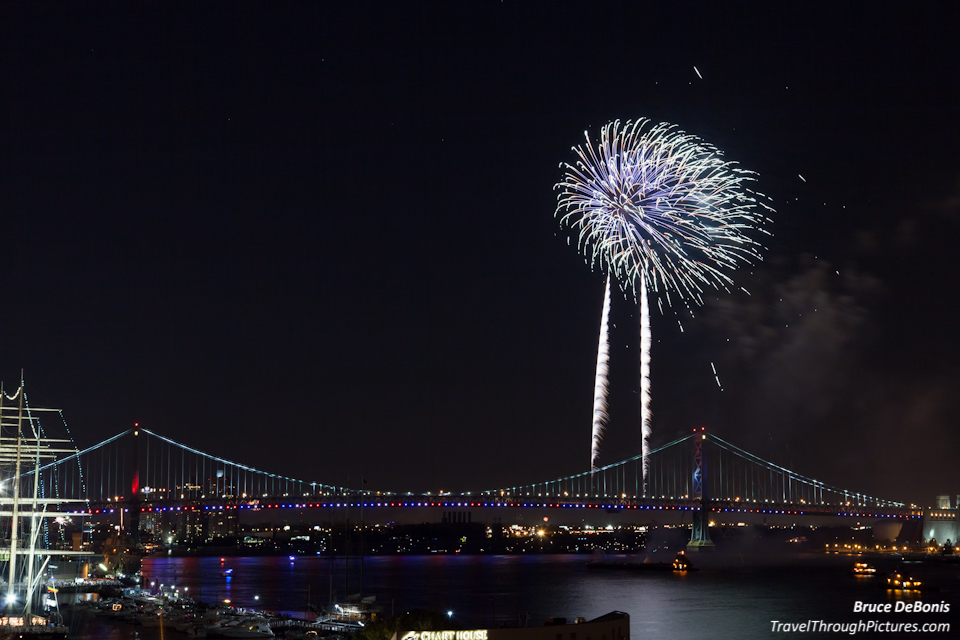
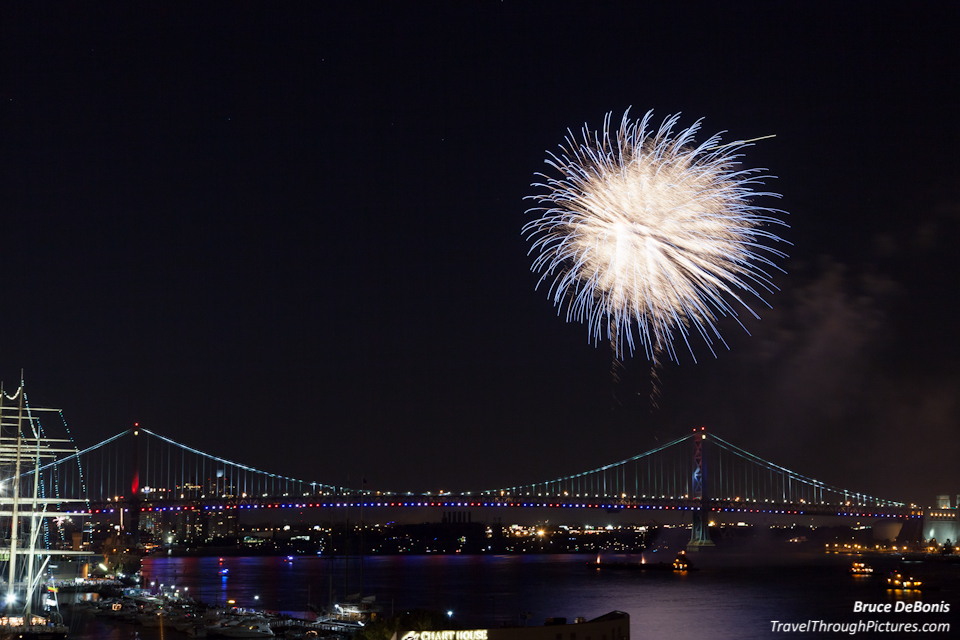
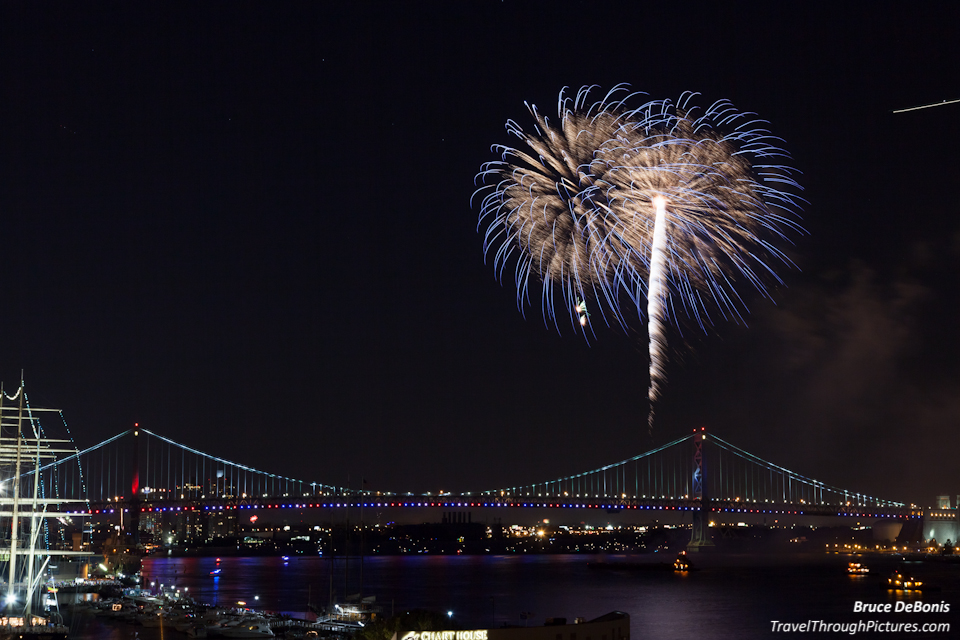
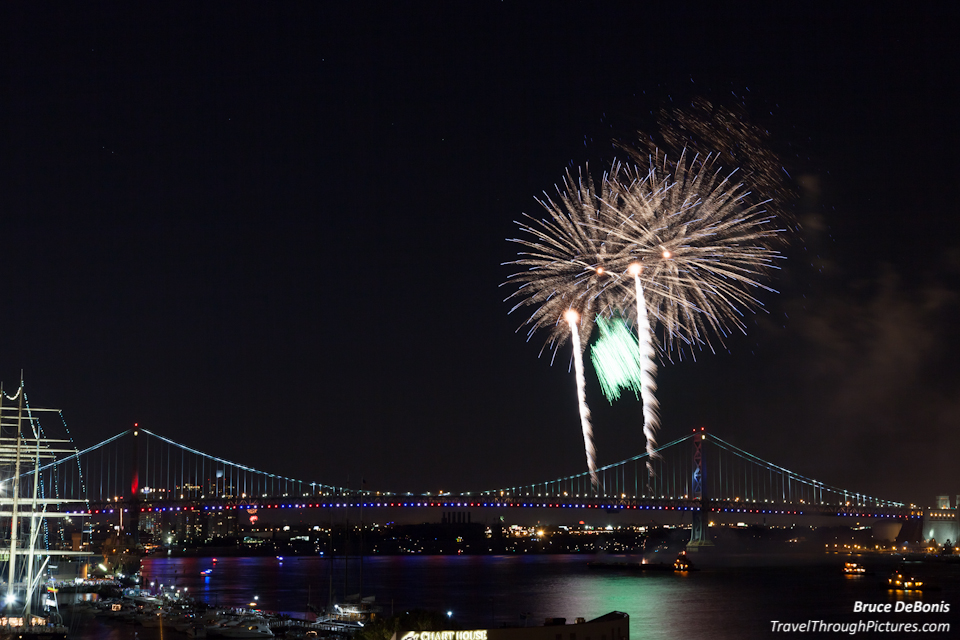
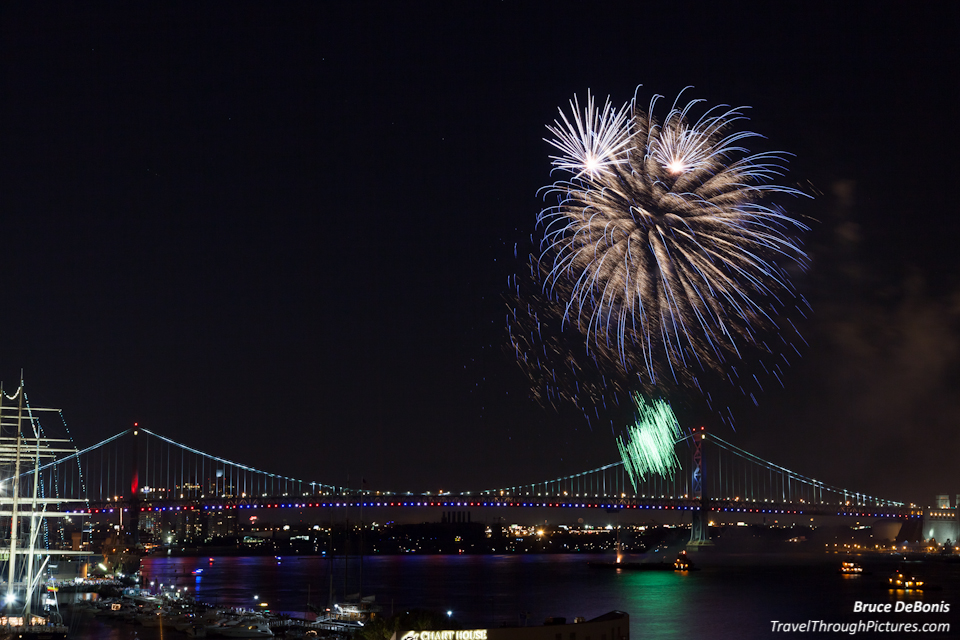
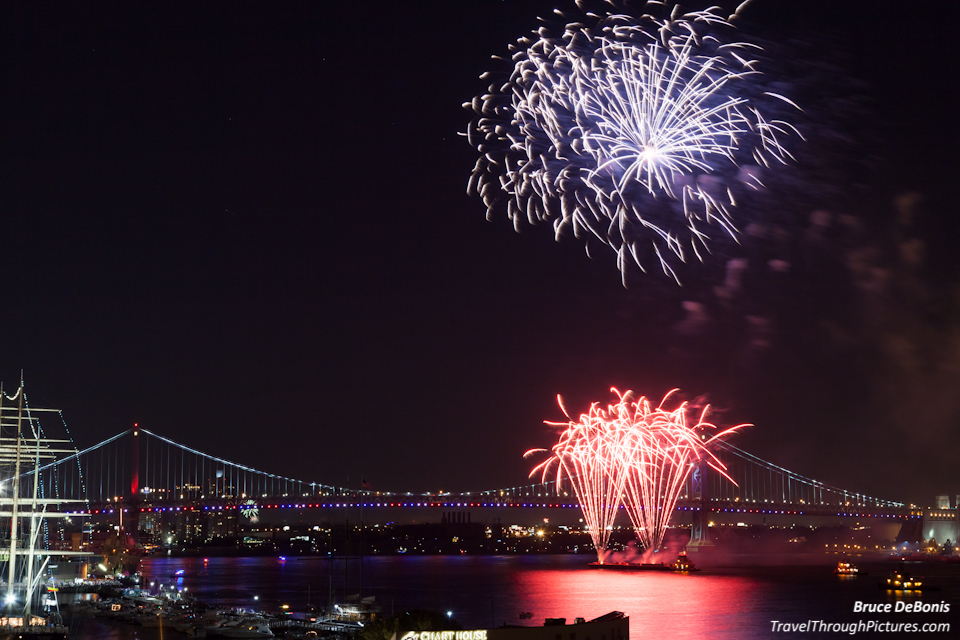
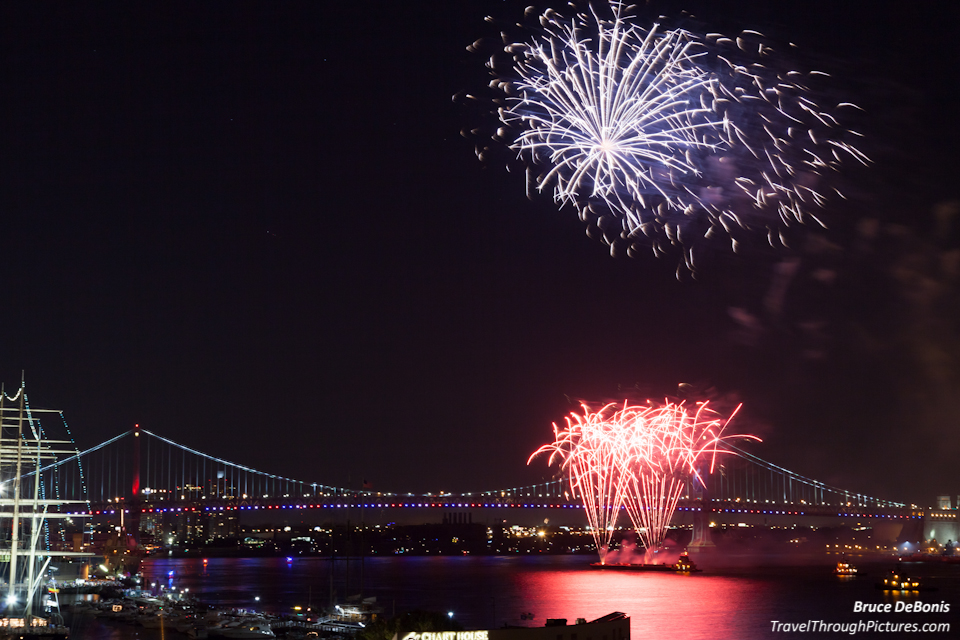
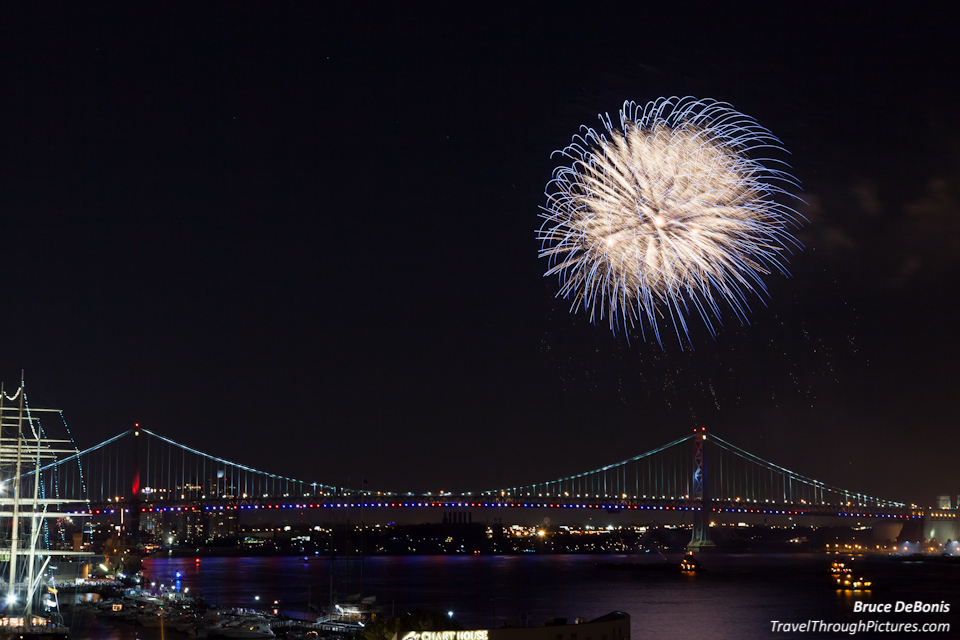
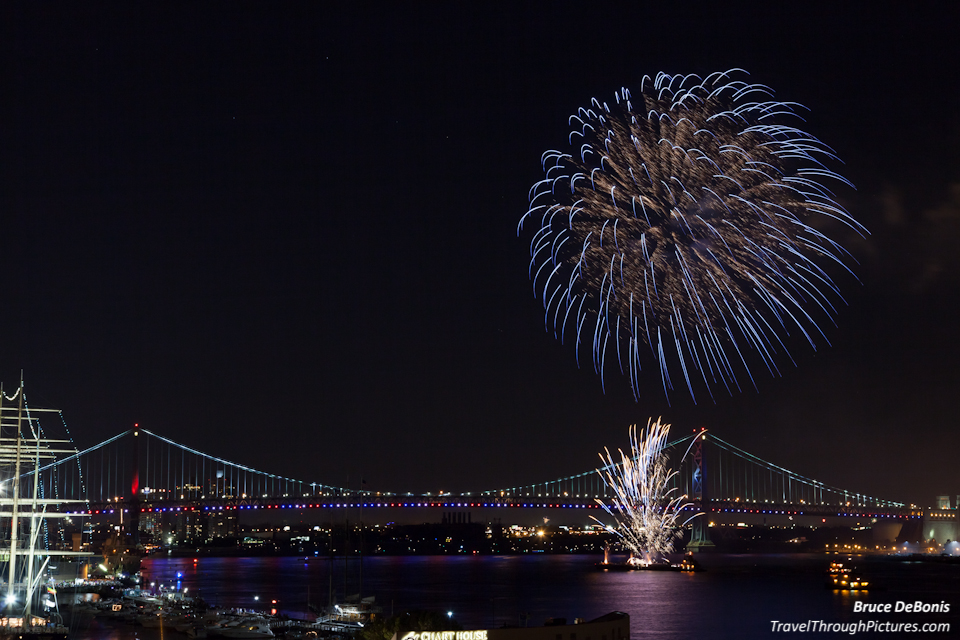
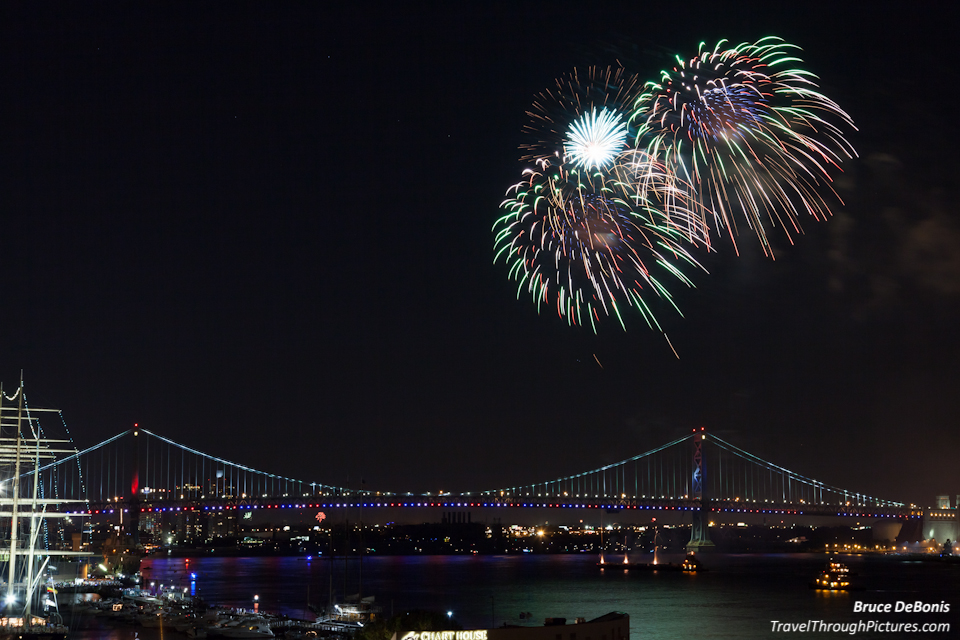
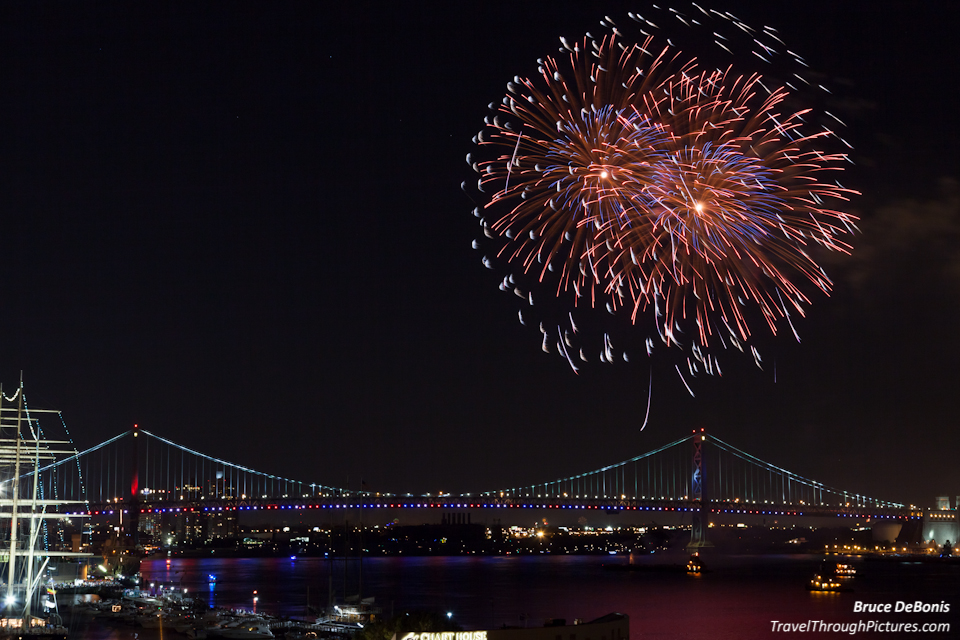
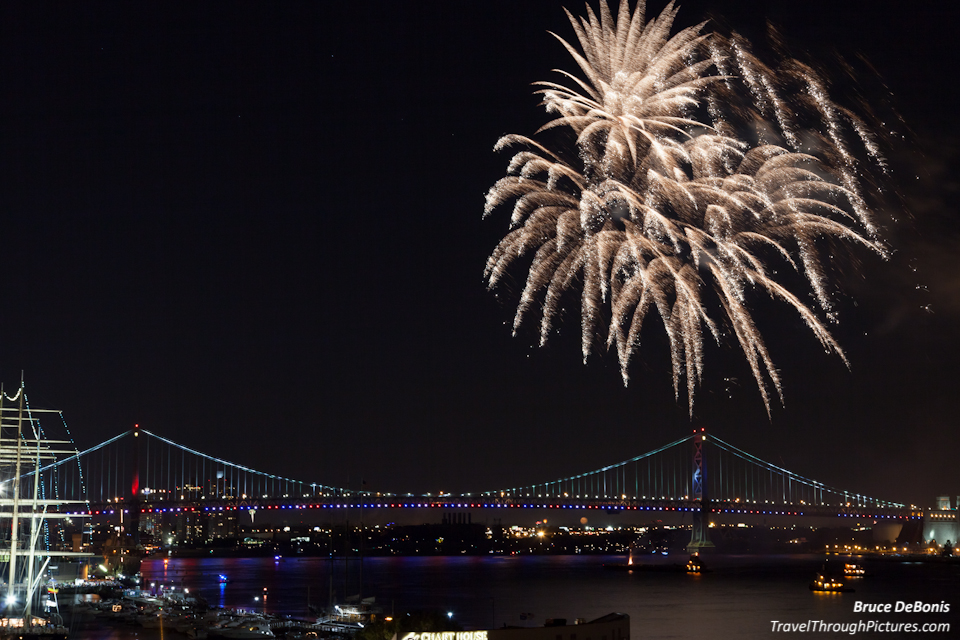
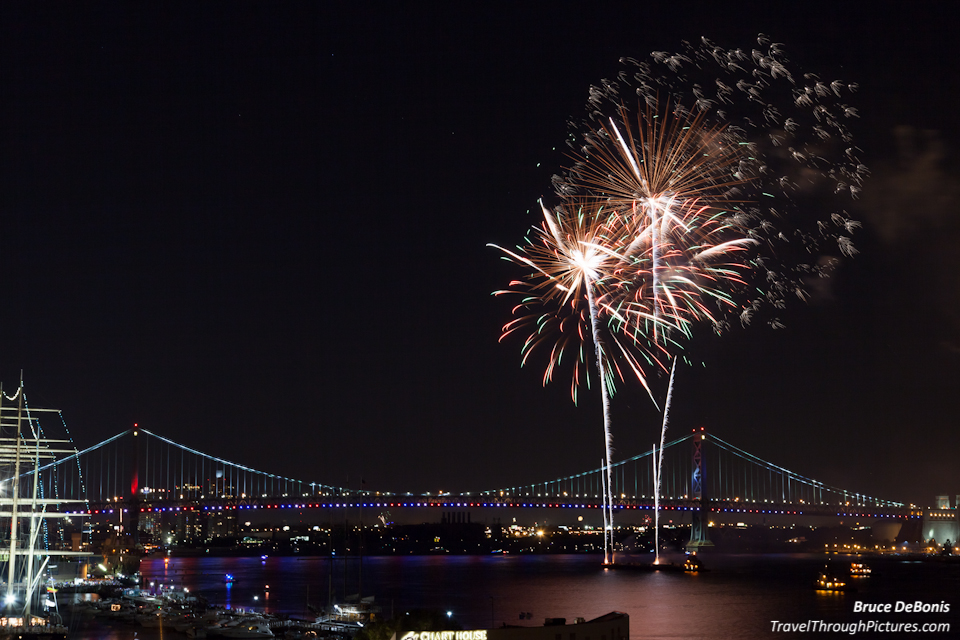
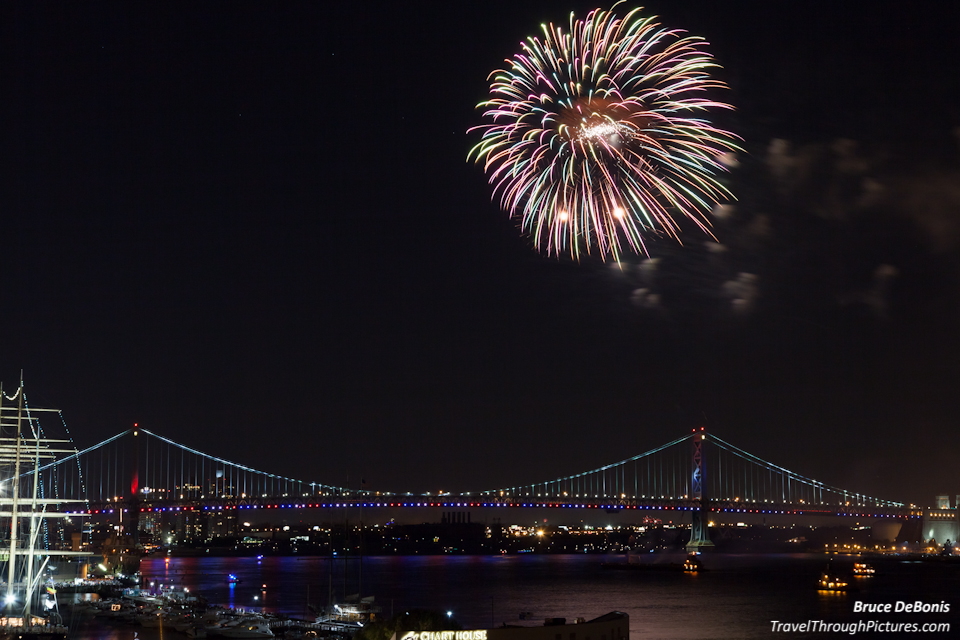
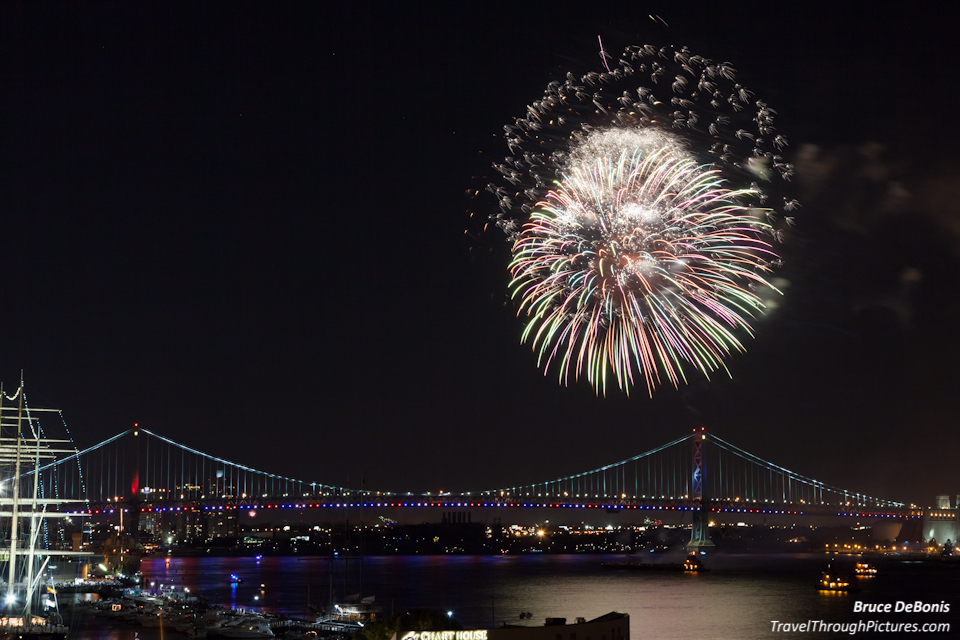
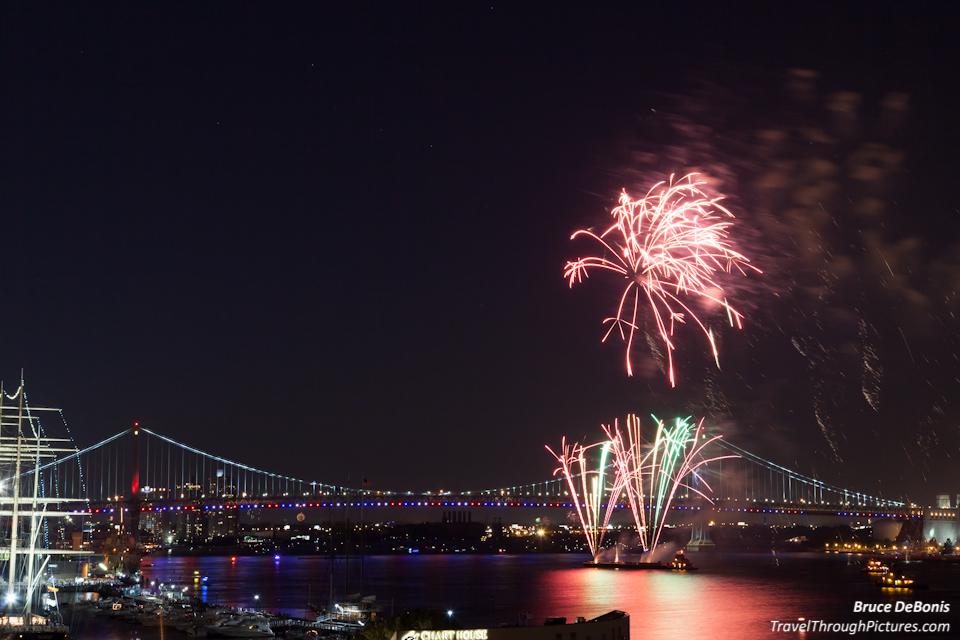
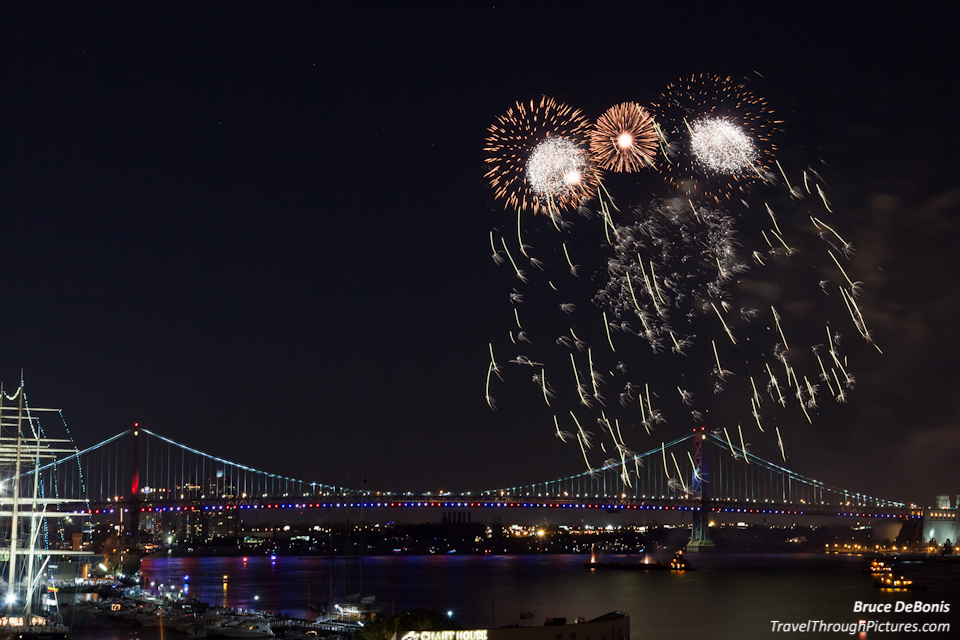
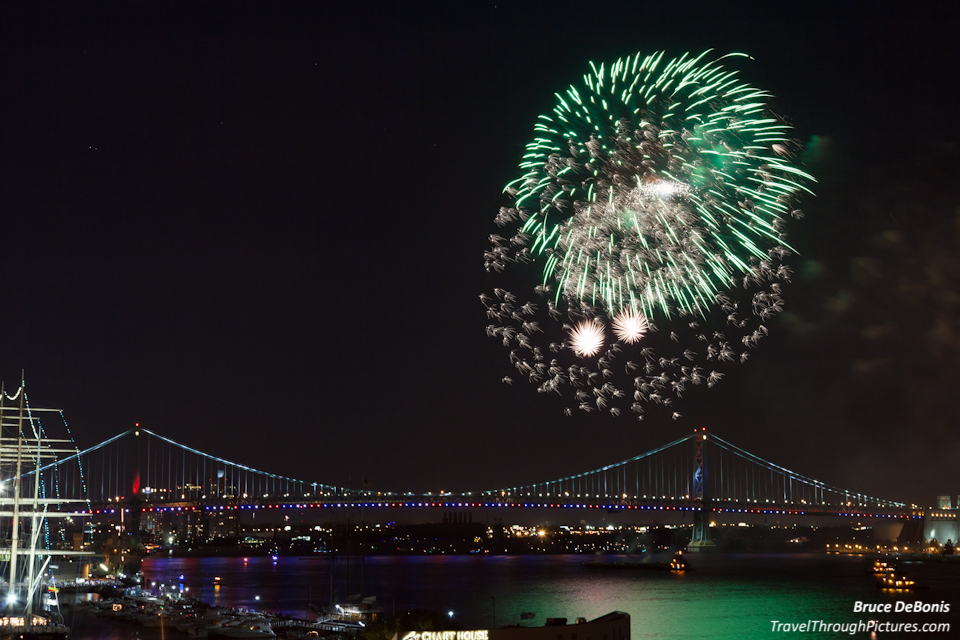
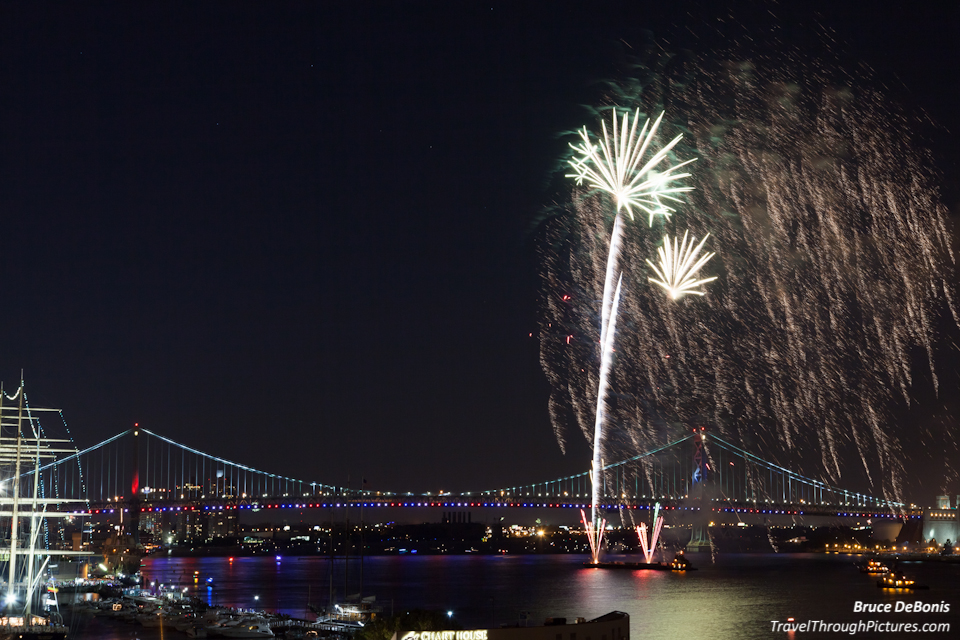
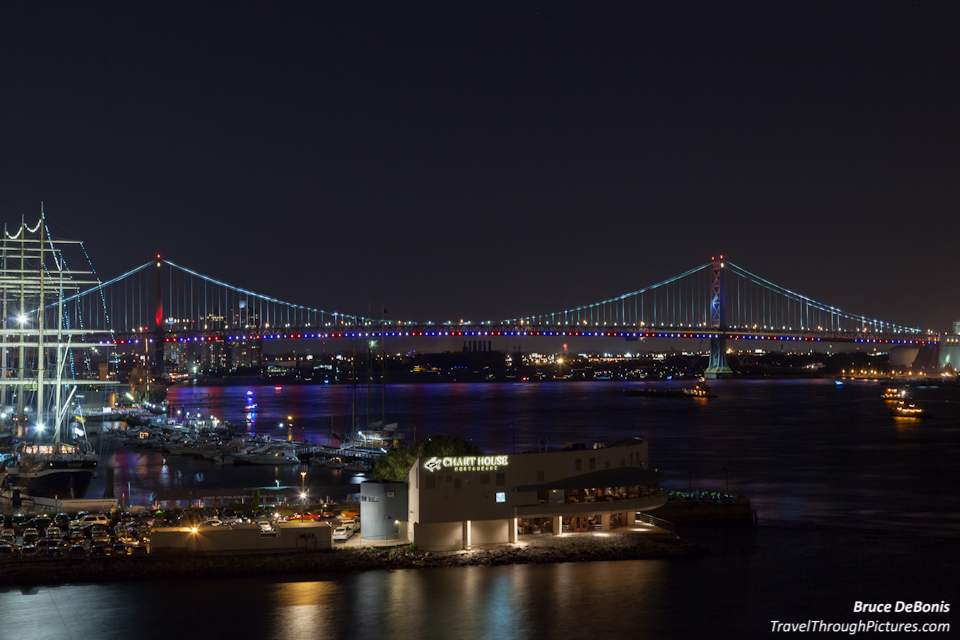
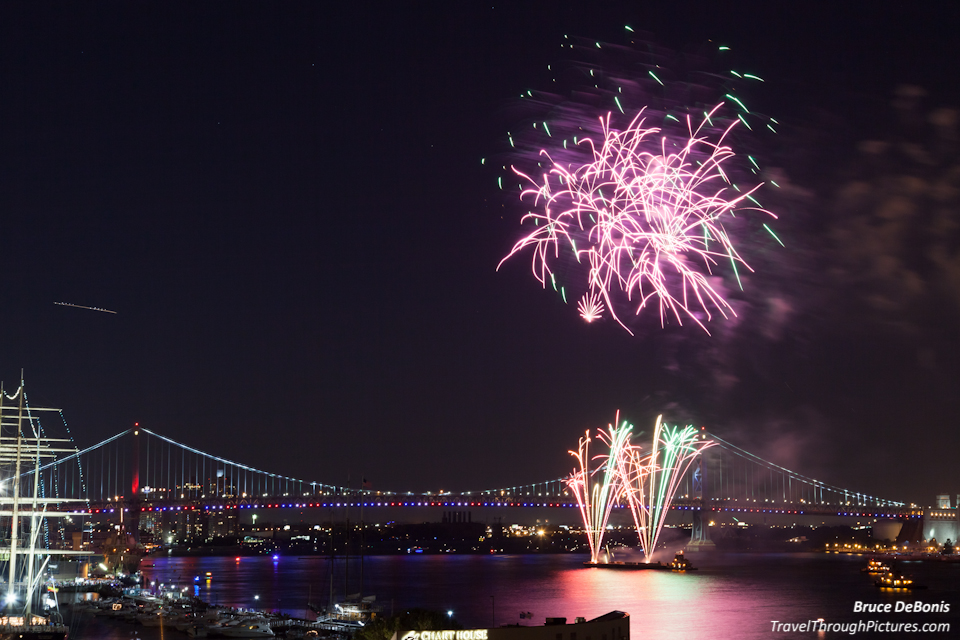
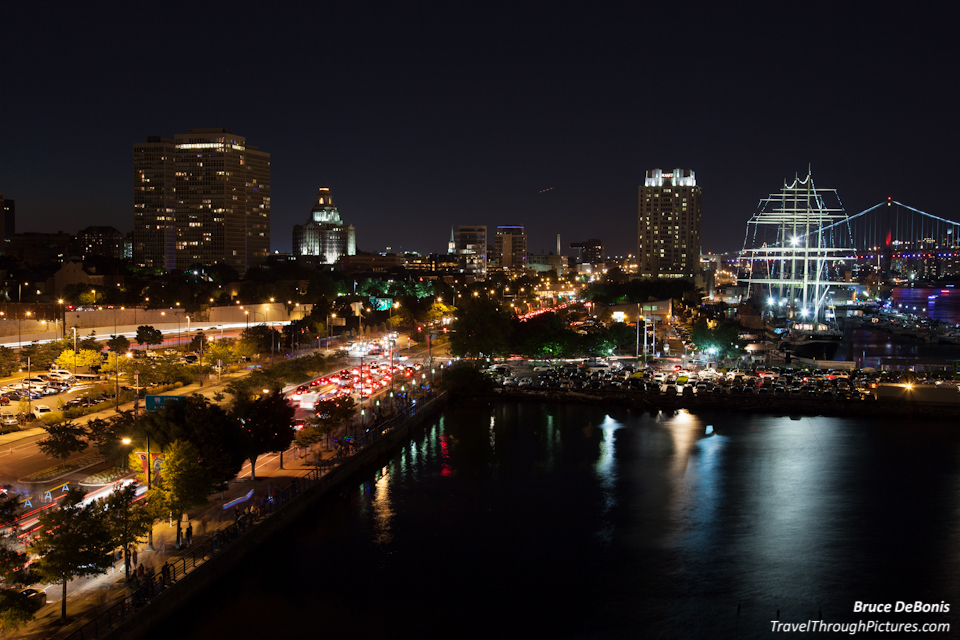
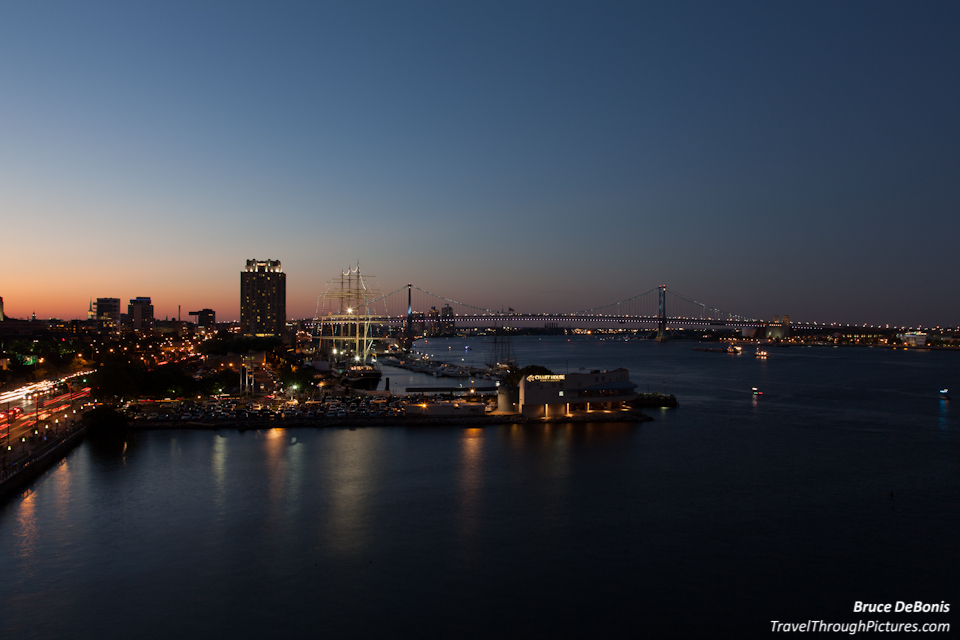
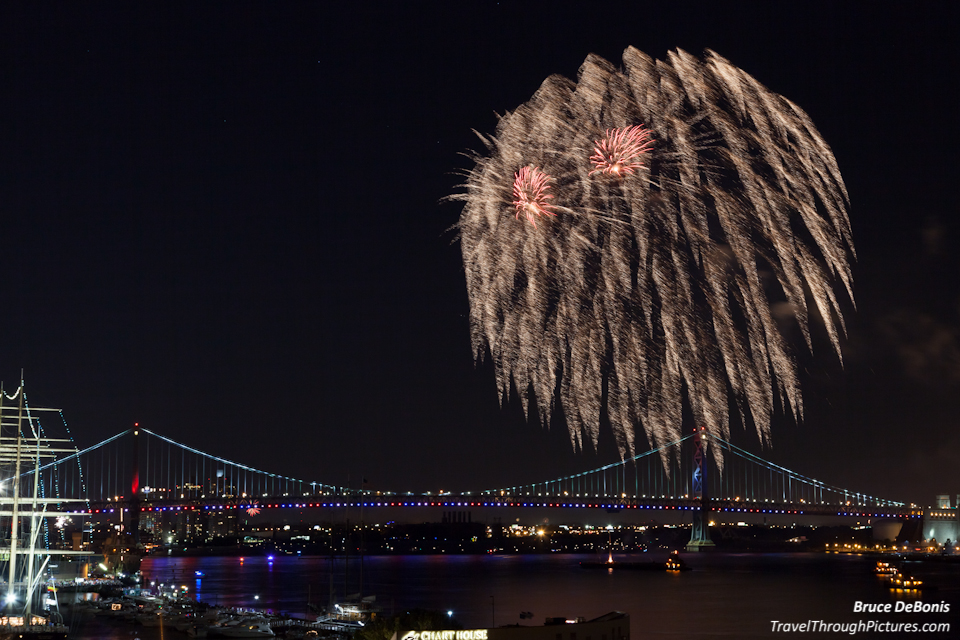
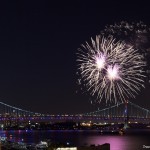
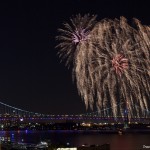
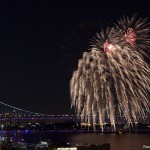
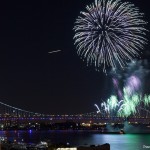
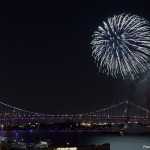
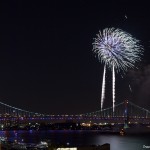
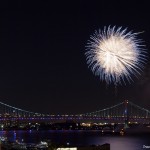
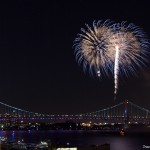
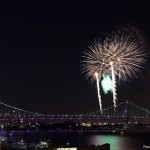
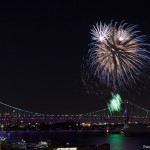
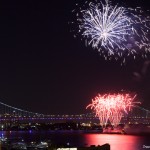
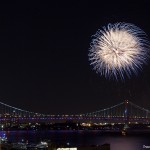
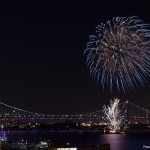
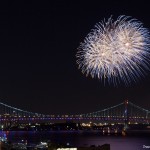
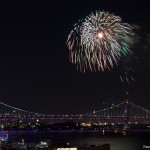
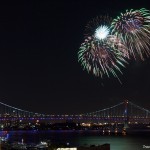
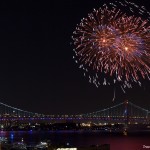
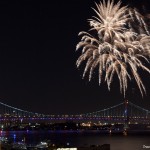
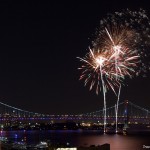
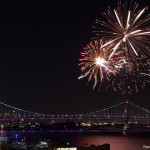
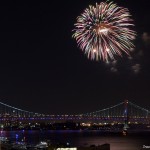
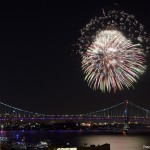
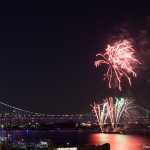
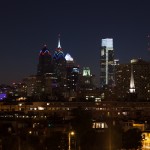
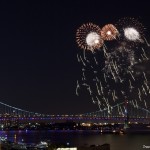
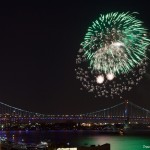
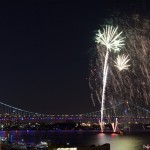
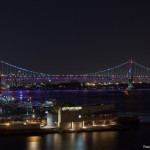
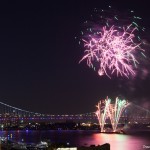
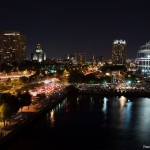
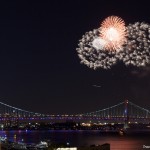
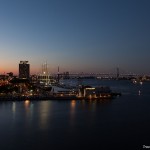
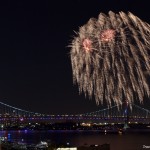
It is best to try and get some perspective into your frame such as a city skyline or horizon as a nice backdrop. I was lucky for these shots as friend of mine had an apartment overlooking the Delaware River in Philly, six floors up, and with the Ben Franklin Bridge as a backdrop. The wind and weather cooperated too…. This was just a very lucky night for me.
Set up early and make it solid
I set up early to grab a corner on the balcony and left my camera and tripod there for the duration of the party. Now beer can give you great creative insights, but somehow it wrecks your ability to understand structural rigidity, so I spent the first fifteen minutes after my arrival setting up. My Manfrotto 190CXPRO4 tripod and 222 pistola head is super flexible in letting me get firm, solid support on the balcony. I had one leg horizontal over a concrete pillar with the other two down to the patio floor. This thing was solid as a rock. You will be making long exposures and this requires an absolutely solid platform to prevent squiggles in your firework trails.
Set your camera to Manual Mode and plan ahead
Here is how to configure your camera:
- Manual Mode
- Turn flash OFF
- Set ISO to 100 for best quality and lowest digital noise
- Set Aperture to f/4 (or lowest number you can go, but not lower than f/4)
- Set Shutter for 2 or 2.5 seconds
- Set white balance to Daylight (not required if you are shooting RAW)
- Use a remote shutter release
- Image stabilization / vibration reduction (either on or off is OK)
- Turn auto-focus OFF
- Adjust your zoom, manually focus your lens on infinity, then don’t touch it
The big variable here is the shutter time. You want to keep it open long enough to get nice ignition trails. I think the best is 2 seconds. Now here is where you need to plan a bit.
Since you would like to take some test shots, you will have to do this at the very start of the show so plan what you want to test for and what you will then do. First, check for the length of the ignition trails and size of the bursts: if you like longer and larger, add one click of time to the shutter (I shot the above at 2 and and some at 2.5 seconds). Then, if the trails are too bright, then darken them by closing your aperture by one click (larger f/number). Another thing to think about is capturing the surrounding environment. You want it to be dark as it is night, but you don’t want to black it out either. Beware, if you screw around too much, you are going to miss the fireworks and have fewer keepers!
If your background is too dark, open your aperture more (lower f/number) if you can. If you feel your pictures are still too dark and your aperture is wide open, try moving your ISO to 200 but only do this as a last resort as it introduces noise into black and dark areas of your picture.
If you like my pictures above, you should be happy with my settings but you are welcome to experiment and learn.
Composition & Focusing
You have two general choices when framing the bursts: 1) Fill your frame with the burst, or 2) Capture the burst and the environment for context. Since I had a great view of the bridge and city lights, I chose option 2. I shot a bunch with the bursts in the center of the frame but somehow they didn’t look great. Then the powerful Rule of Thirds approach to composition popped into my head so I quickly re-framed the shots. These looked much better to me so I shot the rest of the show framed as you see above. Click here for my explanation of the Rule of Thirds.
After you compose your shot with your zoom, make sure your auto-focus is turned OFF, and manually focus your lens on infinity. If you screw around with your zoom during the shoot, make sure to recheck your focus at the same time by reading the scale on your lens. Messing with the zoom will usually throw your focus off.
Techie stuff and post processing
In post processing, the white balance was a mess. If you have to set your camera’s white balance, set if for daylight. Since I shot RAW, how the camera was set is irrelevant as white balance is applied after the image is stored in the camera. In post processing, I moved color temp to 3309 and tint to 0 which made the sky and other colors more natural.
Note for those who checked the metadata: as you may have discovered, most were shot at f/5.6 but when I processed them on my PC, I discovered that I had to bump up the exposure by +1 stop or so. That is why I am recommending opening the aperture by one stop to f/4 over what I used. If you think my pictures are a bit too light and you like a blacker background, then use f/5.6. When I bumped up +1 in post processing on my PC, I saw chroma noise and banding in the dark sky as the Canon Mk II is not as great as some may think. So, I used some color and luminance noise reduction sliders in LightRoom 4 to reduce this nastiness.
Firing and Timing
I don’t like capturing the explosion as it tends to be very bright and ends up being an overexposed, washed out part of your picture. I think my best pictures were snapped just after ignition but this is a matter of taste.
Now you don’t want to shake your camera in the least bit. So for this, I use the now discontinued Canon RC-1 Remote Wireless Controller (the RC-6 does the same). It uses infrared light to trigger the shutter so you don’t have to press down on the camera body. The downside to this infrared trigger is that the receiver on my Mark II body is on the body front so I must reach around and aim the controller back at the camera. No biggie, but kind of clumsy.
Canon also makes wired controllers or you can buy one of the cheap knock offs on eBay as they also work really well. A quick note on eBay knock offs: I generally don’t recommend them and prefer to buy brand-name stuff as it is generally well built and works. However, in my opinion, Canon over-charges big dollars for their cheaply built but very adequate controllers so I have no issue trying out the knock offs. I tried a super cheap, knock off intervalometer / timer controller I found on eBay and it works flawlessly but of course, your mileage may vary.
 One last tip: carry a little flashlight so you can read your lens focus scale in the dark. I have some little thumb-sized, key chain, LED light that I picked up at Brookstone attached to my neck strap so it is always with me.
The Equipment:
- Canon 5D MkII
- Canon 24-105 L f/4.0 IS
- Canon RC-1 Remote Wireless Controller
- Little flashlight
- Manfrotto 190 CXPRO4 tripod
- Manfrotto 222 pistola head
- Beer to learn, beer to create, beer to shoot

